

Ecommerce Pro / FAQ
Configure custom fields in Shopify
Improve address capture in your Shopify store linked with Envia.com's Ecommerce Pro. This configuration allows your customers to enter street, number, neighborhood and references This facilitates the creation of guides and enhances the shipping experience.
Configure address fields
1. Login to your Shopify store settings
- Log in to your Shopify account.
- Go to Configuration > Payment screen (Checkout).
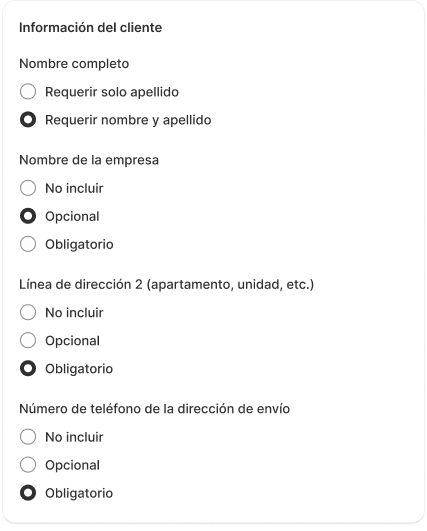
2. Adjust the required and optional fields
- Field References (as a company name):
- In the Customer Informationlocate Company name.
- Mark it as optional.
- Field Colony (as address line 2):
- In the same section, locate Address line 2 (floor, apt., apt., apartment, building, etc.).
- Mark it as mandatory.
- Field Phone
- Mark it as mandatory.
3. Modify the checkout texts (language)
- In the configuration menu, go to Checkout screen language.
- Click Manage checkout screen language.
- Make sure you are in the Checkout & system.
- Change the default texts:
| Field | New text |
|---|---|
| Optional company label | References (optional) |
| Address2 label | Colony |
| Address1 label | Address (street, avenue, exterior and/or interior number) |
- Save the changes.
Expected result
With this configuration:
- The customer will be able to correctly enter the complete address in differentiated fields.
- The field Colony will be mandatory and will be well identified.
- The field References will be available as optional to indicate additional address details.
ℹ️ This configuration is essential to ensure that shipping labels are generated correctly on Envia.com and to avoid errors due to incomplete addresses.
Additional configuration on Envia.com
Go to the section Store settings
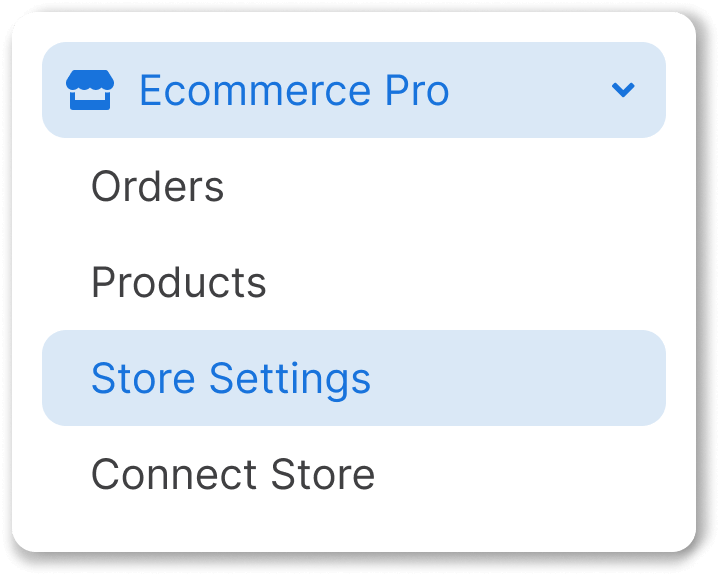
2. Scroll down to the Advanced configurations and activate the option Destination address

This optimizes the synchronization of addresses entered in Shopify with Envia.com, ensuring correct label generation and a better shipping experience.
Did you find this resource useful?