

Etsy
Connect your Etsy shop to Envia.com to see your orders in Ecommerce Pro and prepare the shipment. You complete the destination address with Etsy’s official orders file or, for a single order, from the Address tab.
Connect your Etsy shop to Envia.com
Section titled “Connect your Etsy shop to Envia.com”The person who connects the shop must be registered as a seller on Etsy.
- Sign in to your Envia.com account.
- Go to Ecommerce Pro > Connect Store.
- Click Integrate my ecommerce and select Etsy.
- Enter your Etsy shop name and continue.
- Sign in to Etsy and authorize access.
- Verify the email registered in Envia.com and click Continue.
Your Etsy shop is now integrated with Envia.com.
Set up your store in Envia.com
Section titled “Set up your store in Envia.com”You make these settings from your Envia.com dashboard. They are required for the integration to work correctly.

Origin address and packages
Set where your shipments leave from and which packaging you use. This is required to schedule pickups and get quotes.
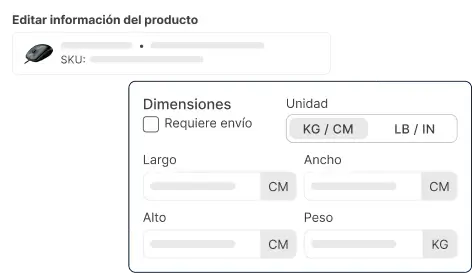
Products
Set the weight and size of each product. The system then calculates rates correctly and picks the right package.

Automatic package
The system picks the best packaging for each order so you do not have to do it by hand.
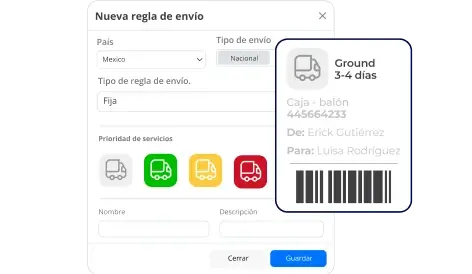
Automatic shipping rules
Set shipping rules that automatically calculate shipping costs for your orders.
Download the orders file from Etsy
Section titled “Download the orders file from Etsy”Envia reads the orders CSV, the one for your sales. The file is often named EtsySoldOrders. The items file and the payments file use other columns, so the street is not imported.
-
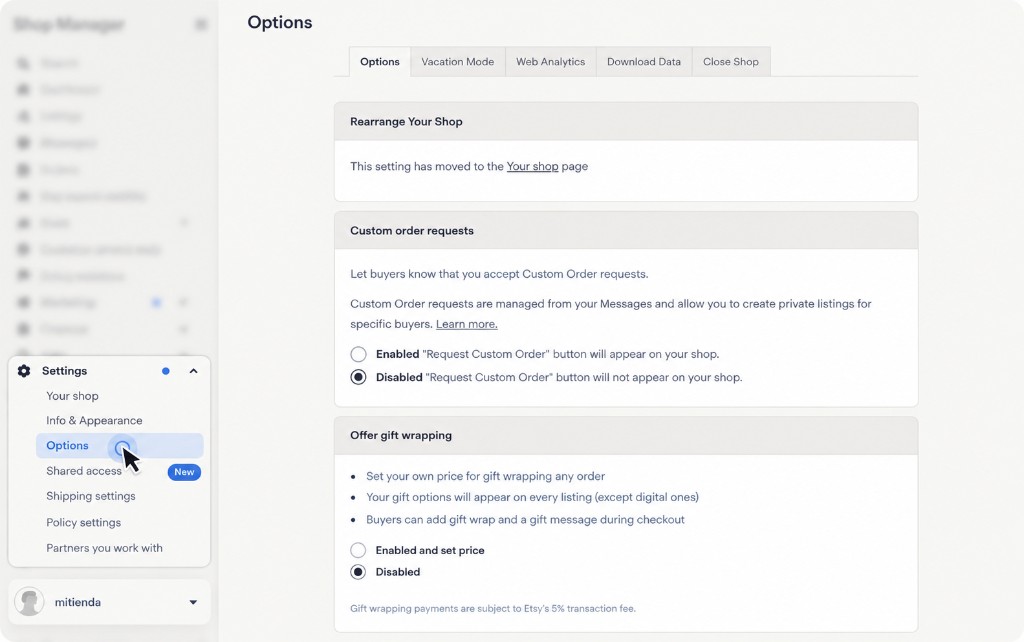
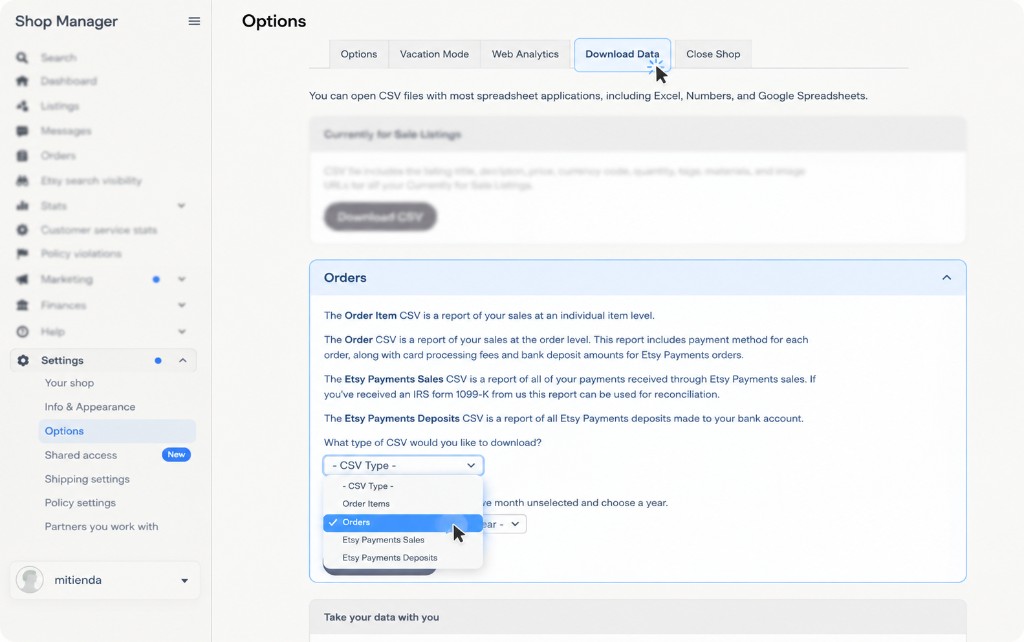
Sign in to Etsy and open Shop Manager.
-
Go to Settings, then Options.
-
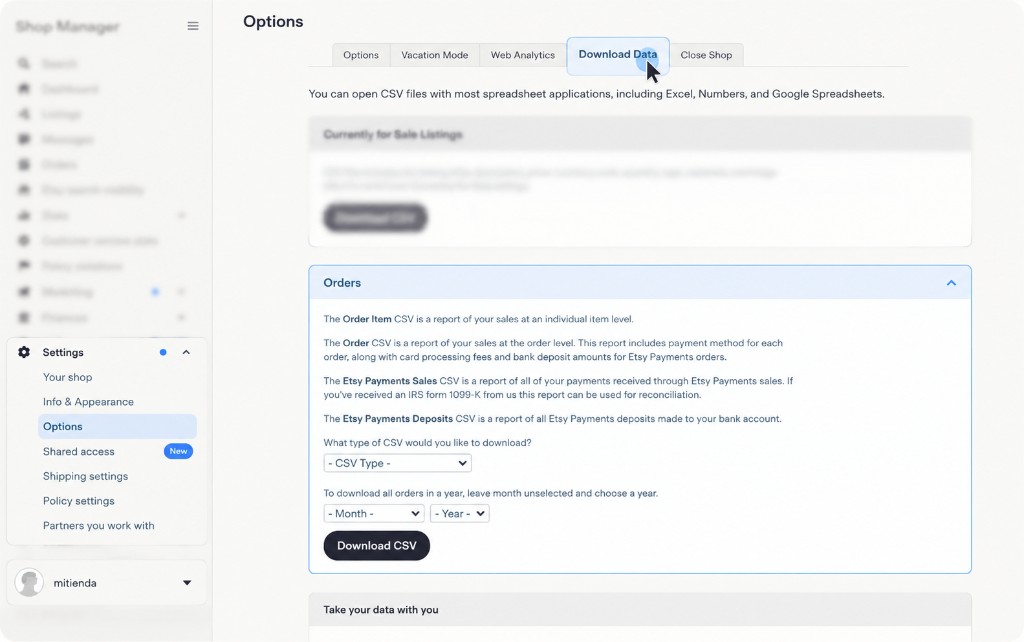
Open the Download Data tab.
-
Under Orders, choose the Orders type.
-
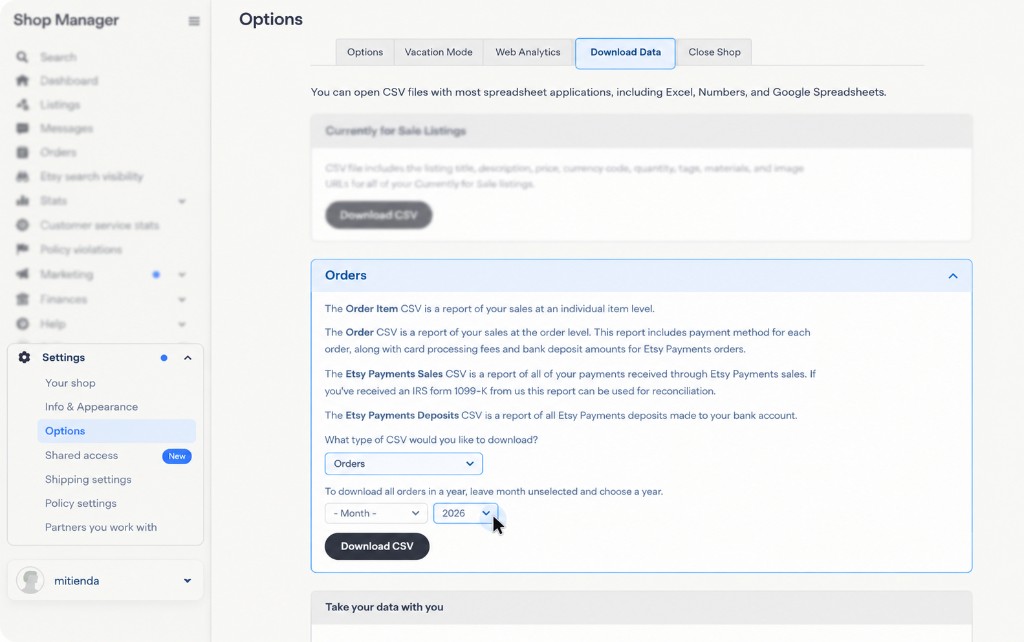
Choose the year. If you leave the month empty, Etsy downloads that full year.
-
Click Download CSV.
Import addresses in Envia
Section titled “Import addresses in Envia”The Import Etsy CSV button appears only if at least one Etsy shop is connected. On large screens it sits next to Refresh. On smaller screens it is inside the Refresh menu.
- Sign in to your Envia.com account.
- Open Ecommerce Pro.
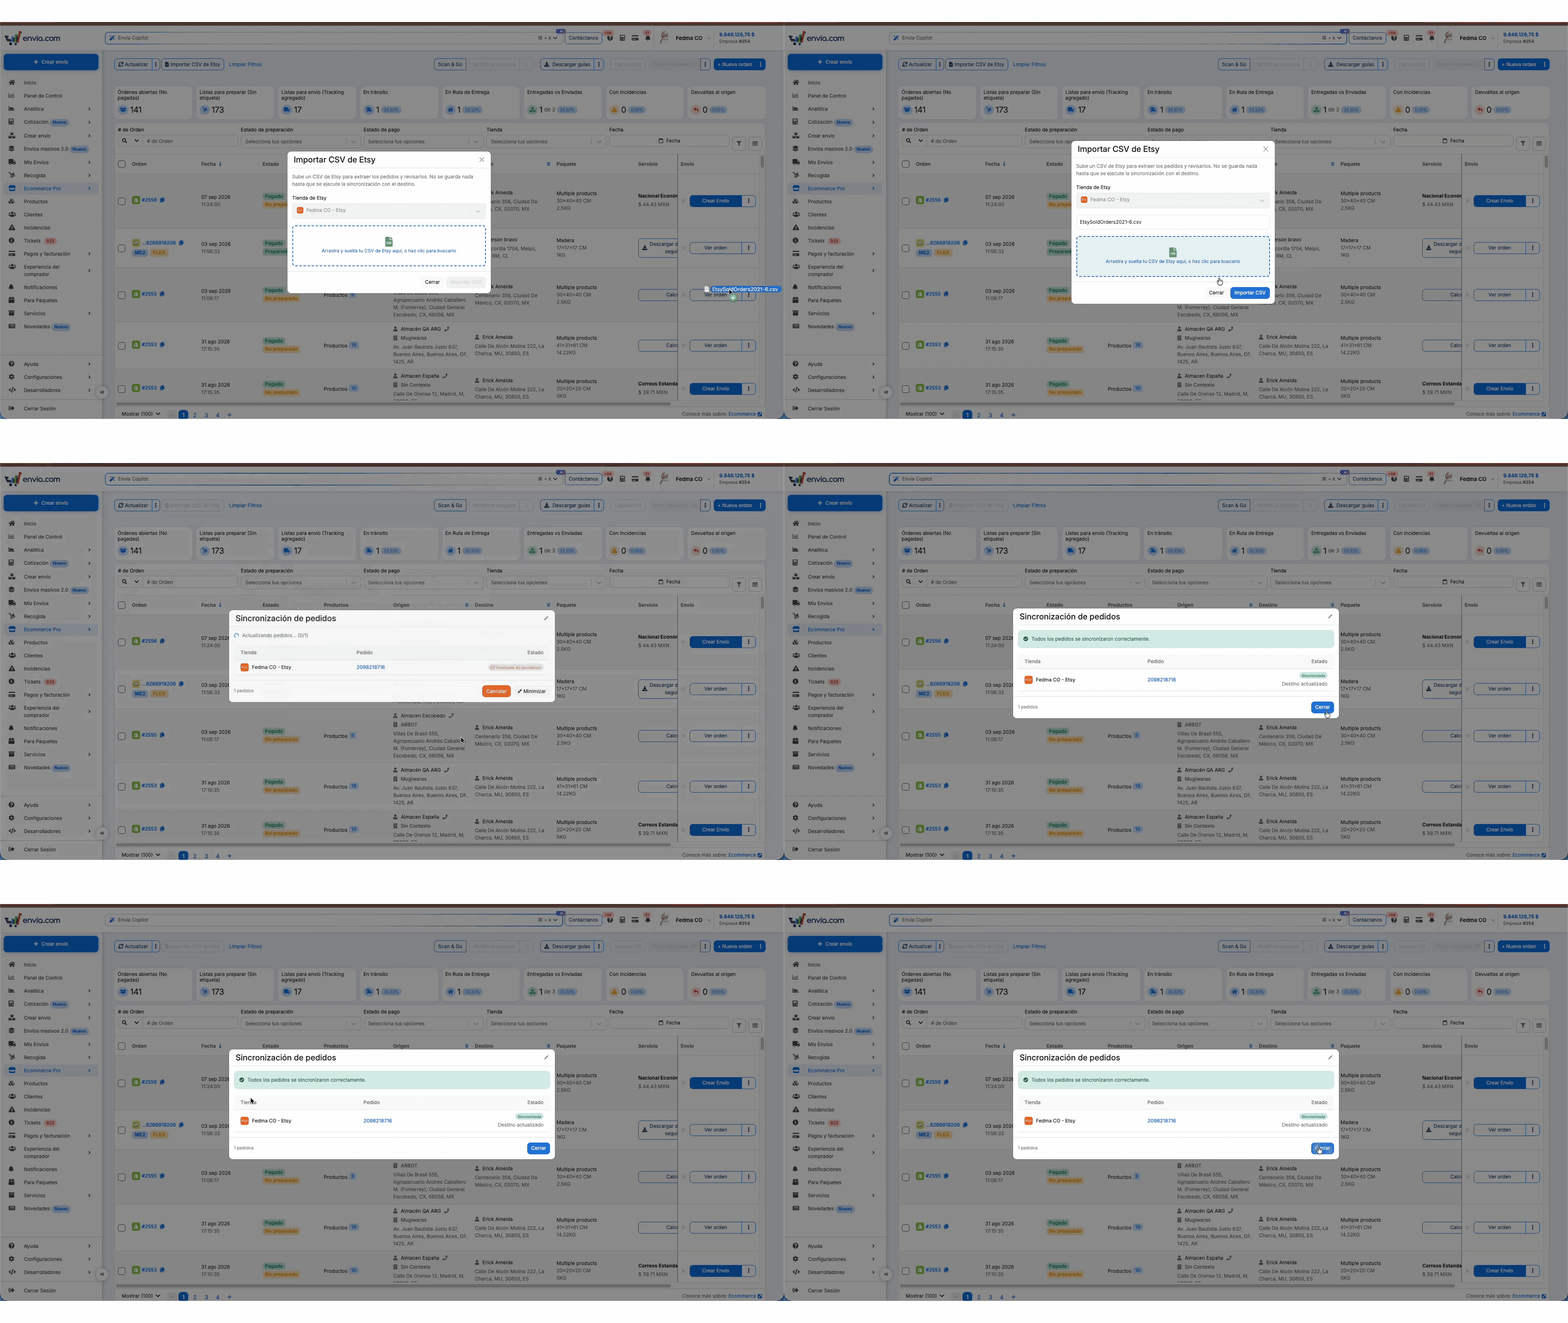
- Click Import Etsy CSV.
- Under Etsy shop, choose the shop the file belongs to.
- Drag the orders CSV onto the window, or click to browse for it.
- Click Import CSV.
- Check the progress of each order. You can minimize that window and keep working.
If the order is already in Envia, the file adds or updates only the destination address. The rest of the order stays the same. If the order is not in Envia, it is created and the address in the file is not applied.
Fill in the address for one order
Section titled “Fill in the address for one order”For a single order, or to correct one, open the order and enter the destination.
- On the orders list, click View order.
- Under Customer, open the Address tab.
- Fill in the required fields: Full name, Phone, Country, Street, Postal code, City, and State.
- Click Save.
The Destination column shows the address once it is saved.
If it does not work
Section titled “If it does not work”- If you do not see Import Etsy CSV, connect the shop with the steps above.
- Use the orders CSV. The items file and the payments file do not load the street.
- Choose the shop the file belongs to. If Envia does not recognize those orders in that shop, nothing is imported.
- If some orders fail, the progress shows which ones succeeded and which did not. You can fix the file or upload it again.
- If the file is too large, export it by month.