Ecommerce Pro / Integrate ecommerce

Prestashop

Steps to integrate your Prestashop store

1. Generate a key from Prestashop

  • In Prestashop settings, go to “Advanced Parameters” and then select “Webservice".
  • Click the blueAdd new webservice key” button, do the following for each section and click “Save” when you are done.
SectionAction
KeyGenerate a new key. (This will be useful in step 5).
Key descriptionWrite a description for the key.
StatusMake sure the button is set to “Yes”.
PermissionsSee and configure the required permissions.

2. Access envia.com

3. Go to the Ecommerce Pro > Connect Store

4. Click on the “Integrate my ecommerce” and select Prestashop.

5. Enter the URL of your Prestashop store and click “Continue".

  • (Make sure you are entering the correct URL. To confirm, add /api/ at the end of the store address. If the browser prompts for a username and password, you are on the right track. For more details, you can consult the documentation of PrestaShop).

6. Add your login credentials (Step 1; Key) access and click on Create.

7. Verify your envia.com registered email address and click Continue.

Ready! Now your Prestashop store is integrated with envia.com.

Set up your store on Envia.com

These settings are made directly from your Envia.com panel. They are essential for the integration to work properly.

Source address and packages

Establish where your shipments leave from and what packaging you use. This is necessary for collecting and quoting.

Read more

Products

Define the weight and size of each product. This way the system calculates the rates and selects the ideal package.

Read more

Automatic package

The system chooses the most suitable packaging for each order without you having to do it manually.

Read more

Automatic sending rules

Configure shipping rules that allow you to automatically calculate shipping costs for your orders.

Read more

Use of web services in Prestashop

Verify that you have activated the use of web services in PrestaShop.

  1. In Prestashop settings, go to Advanced Parameters and then select Webservice.
  2. Select the key you generated previously and edit it
  3. Scroll down to Configuration, and in the Enable PrestaShop's Webservice check that the button is set to Yes.

Brazil Recommendation

To incorporate the Identification number field in the checkout of your store, follow these steps.

Permissions for Access Key generation

Consult and configure the required permissions

Error messages during integration


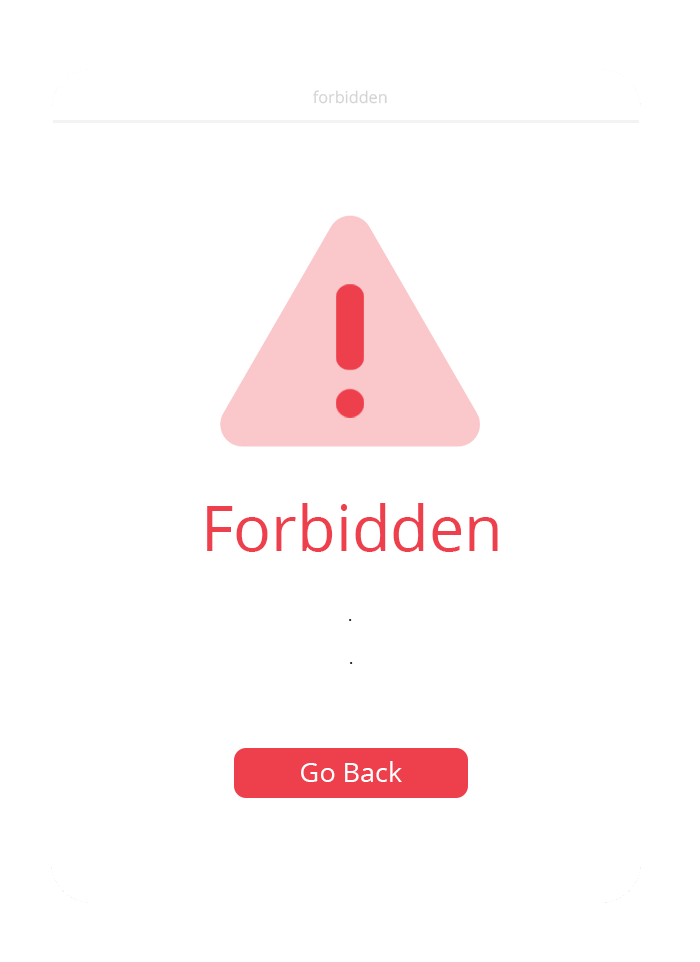
Error Message 403 “Forbidden” o “400”.
This error occurs when the firewall blocks certain API connections or is limited to certain IP addresses.

In these cases, you must temporarily disable the blocking to allow integration or include our IP addresses in your whitelist:

3.227.182.193
54.161.96.109

FAQ

Why are orders not registered after integrating several stores into the same root URL?

You may encounter problems with order registration if you have integrated several stores into the same root URL. Although the integration may appear to be successful, the system will not register orders correctly.

To solve this problem, make sure to perform an individual integration for each store domain by merging them into the same root URL. This measure ensures a correct registration of orders and avoids possible conflicts between stores.

For example, if you have two stores "https://ejemplo.com/1" and "https://ejemplo.com/2" both joined in a root URL as "https://ejemplo.com", you must make an individual integration for each domain.

Is the plugin compatible with PrestaShop version 8.1.5?

Our plugin is currently obsolete so it is not compatible with any recent version of Prestashop.

Did you find this resource useful?

5
0

Send us a message

Our support team will always be available to answer your questions and provide you with the help you need.