

Olist
Connect your Olist store with Envia.com to sync orders and manage your shipments automatically.
Connect Olist from Envia.com
Section titled “Connect Olist from Envia.com”- Sign in to your Envia.com account
- Go to Ecommerce Pro > Connect Store
- Click Integrate my ecommerce, select Olist
- Enter your store name and then click Continue.
- On the next screen you will need to enter:
- Client ID
- Client Secret
These details come from your Olist account. Follow the steps below.
Install the extension in Olist
Section titled “Install the extension in Olist”To generate the credentials you need to install the Gestão de Aplicativos extension.
-
Sign in to your Olist account.
-
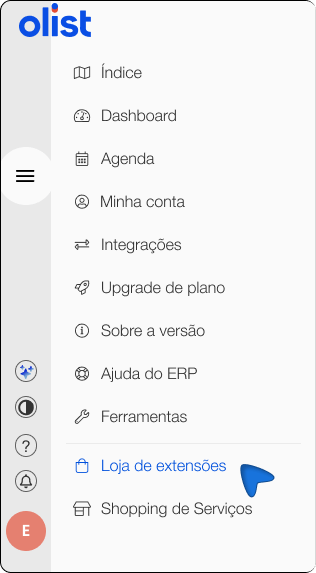
In the left side panel, selectLoja de extensões
-
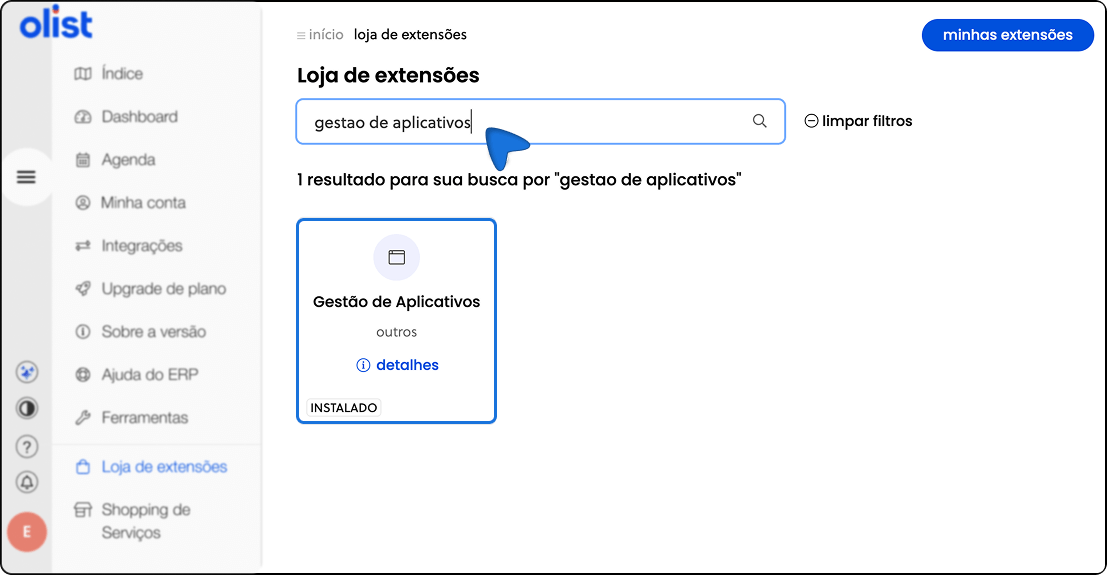
In the search box, type: Gestão de Aplicativos
-
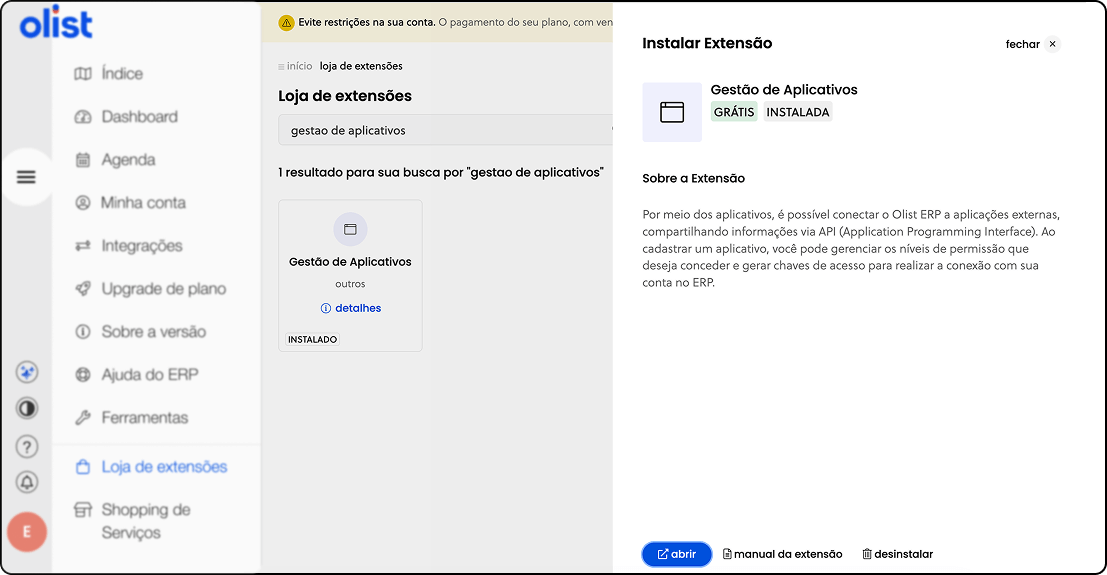
Click Install and confirm the extension installation.
Create a new application in Olist
Section titled “Create a new application in Olist”-
Open the Gestão de Aplicativos extension.
-
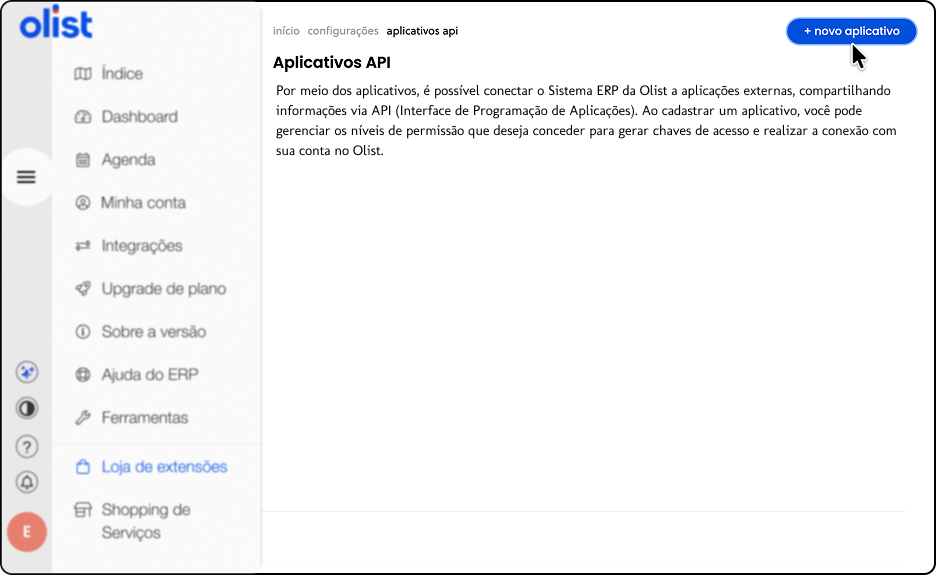
Click Create new application.
-
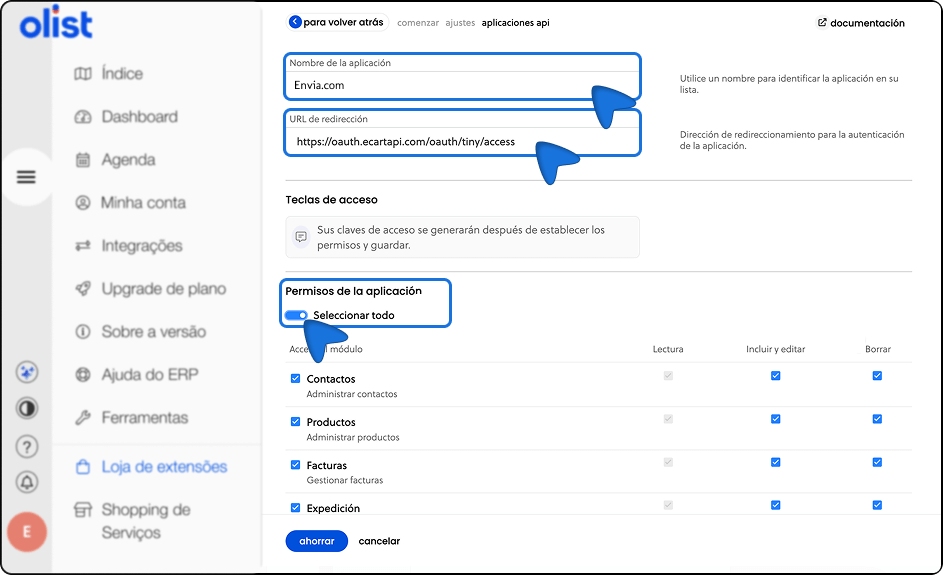
Complete the requested fields:
- Application name. You can use any name, but we recommend using the same Store Name you entered in Envia.com so you can identify it easily
- Redirect URL (required). Enter exactly this URL: https://oauth.ecartapi.com/oauth/tiny/access
- ⚠️ It is very important that the URL is written exactly as shown, with no spaces or changes.
- In the permissions section, select Select all.
- Click Save.
Get the Client ID and Client Secret
Section titled “Get the Client ID and Client Secret”-
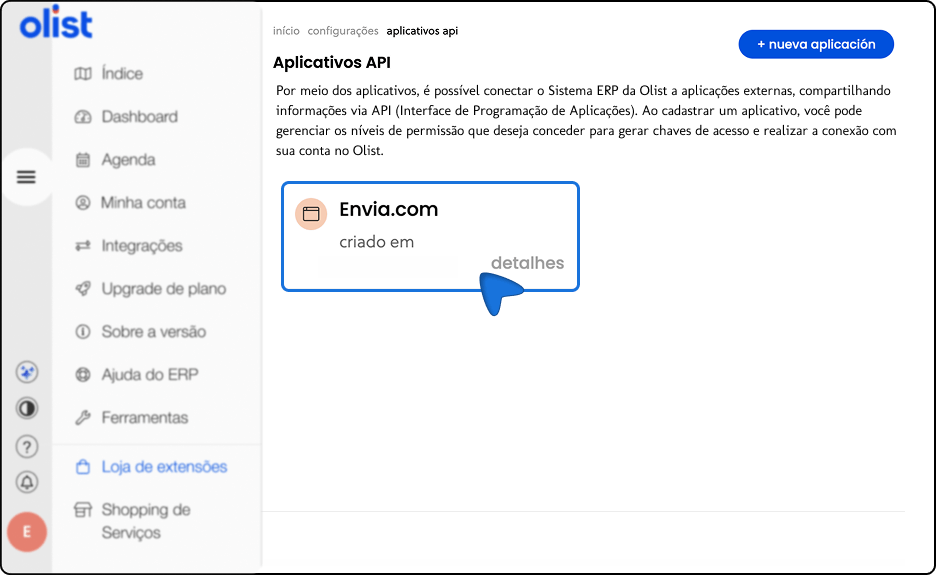
Once the application is created, open it again.
-
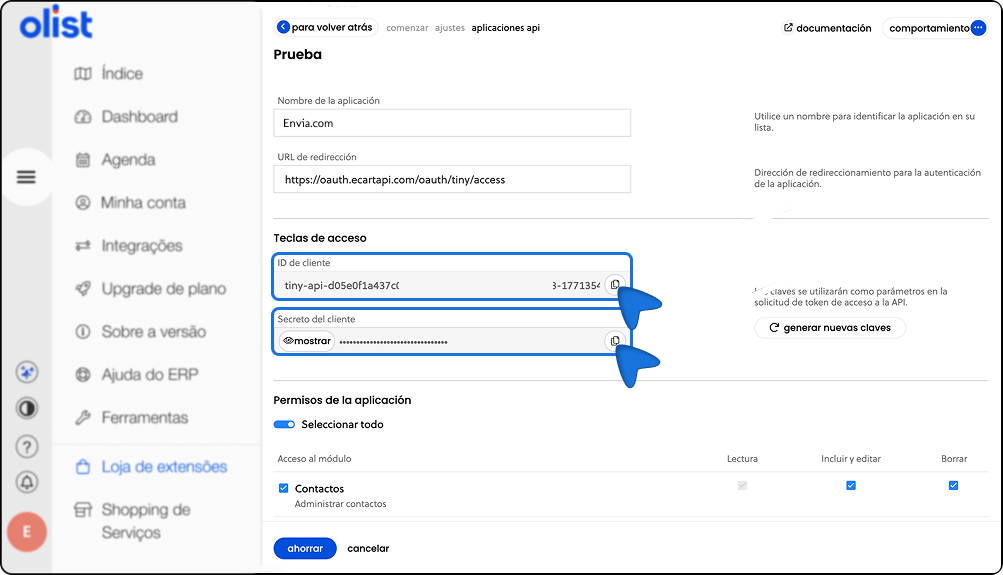
Go to the Chaves de acesso section.
-
Copy the following details:
- Client ID
- Client Secret
Finish the integration in Envia.com
Section titled “Finish the integration in Envia.com”-
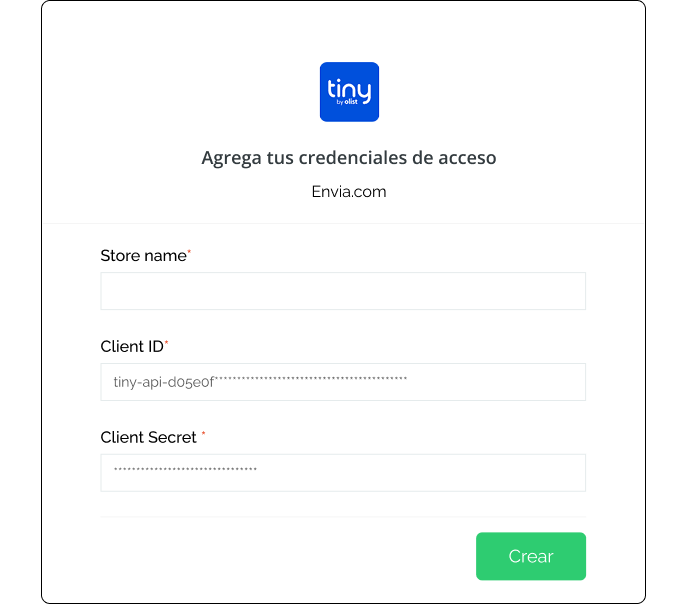
Return to the integration screen in Envia.com.
-
Paste the Client ID and Client Secret in the corresponding fields.
-
Confirm that the information is correct.
-
Click Create.
That’s it! Your Olist store is now connected with Envia.com.
Set up your store in Envia.com
Section titled “Set up your store in Envia.com”You make these settings from your Envia.com dashboard. They are required for the integration to work correctly.

Origin address and packages
Set where your shipments leave from and which packaging you use. This is required to schedule pickups and get quotes
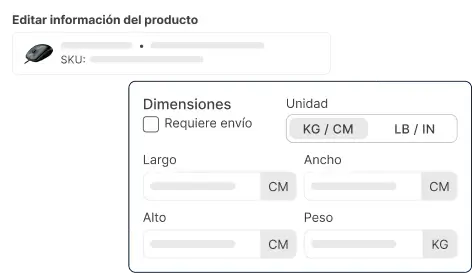
Products
Set the weight and size of each product. The system then calculates rates correctly and picks the right package

Automatic package
The system picks the best packaging for each order so you do not have to do it by hand
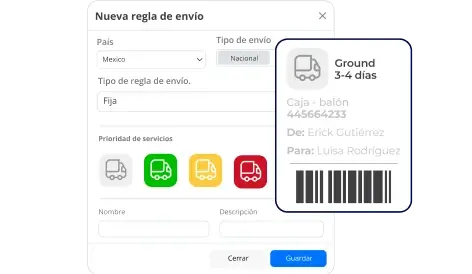
Automatic shipping rules
Set shipping rules that automatically calculate shipping costs for your orders