

Add customers
The Customers section lets you save and organize the information of the people or companies you ship to frequently. With their details on file, you can generate shipping labels faster without entering the data every time.
From this section you can add three types of customers: Individuals, Companies, and Distributors.
Overview
Section titled “Overview”When you open the section you will see a summary with the count of registered customers by type, followed by a table with all your customers.
Customer summary
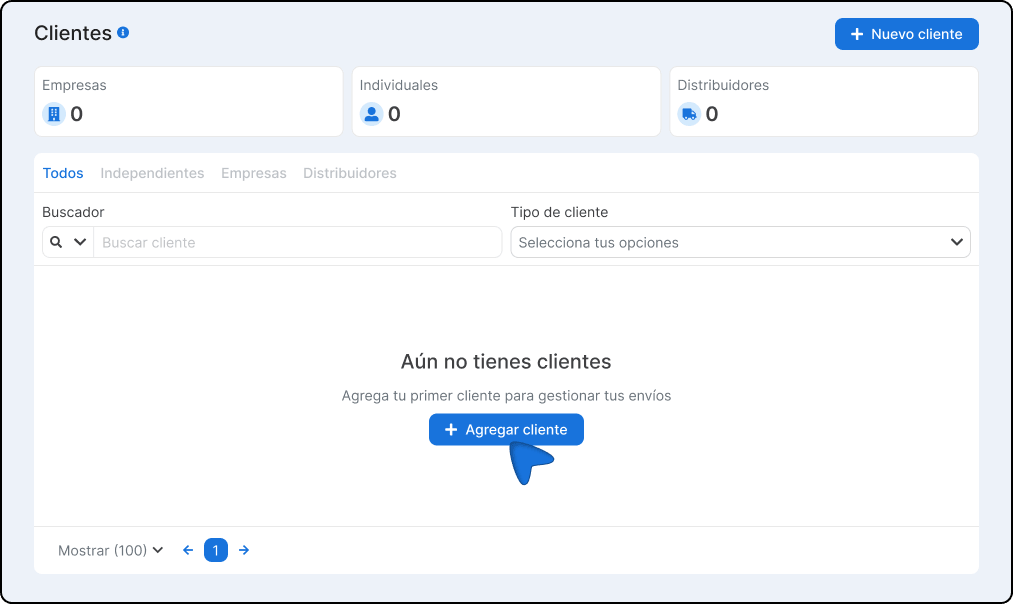
Section titled “Customer summary”At the top, three cards show the total number of customers by category:

| Card | Description |
|---|---|
| Individual | Total customers registered as an individual person |
| Companies | Total customers registered as a company |
| Distributors | Total customers registered as a distributor |
Customers table
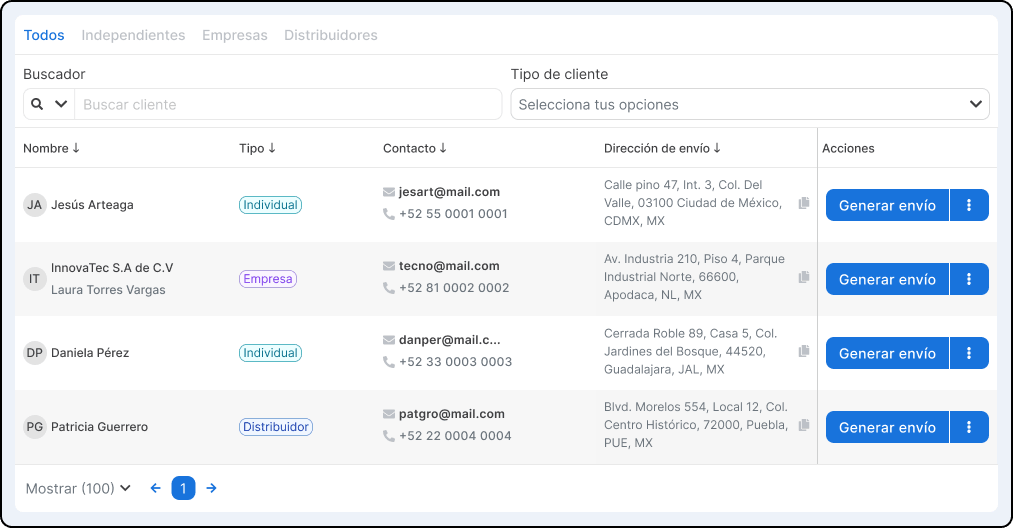
Section titled “Customers table”The table shows the full list of your registered customers. You can move between pages using the pagination controls at the bottom, and adjust how many records are shown at a time.
Available filters
Section titled “Available filters”You can find a customer quickly using the following tools.
| Filter | Description |
|---|---|
| Type tab | Click All, Individuals, Companies, or Distributors to see only that group |
| Search | Type the customer name in the search bar |
| Customer type | Use the dropdown menu to filter by a specific category |
Customer types
Section titled “Customer types”| Individual | For natural persons |
| Company | For businesses or legal entities |
| Distributor | For partners or distributors of your products |
Add a new customer
Section titled “Add a new customer”-
Sign in to your Envia.com account
-
Go to the Customers section
-
Click +New customer.
-
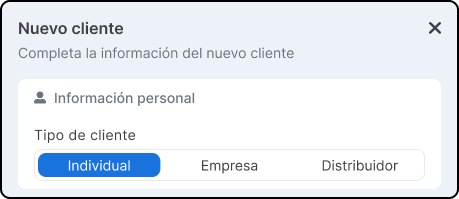
Choose one of the three options:
- Individual - For natural persons
- Company - For businesses or legal entities
- Distributor - For partners or distributors of your products
-
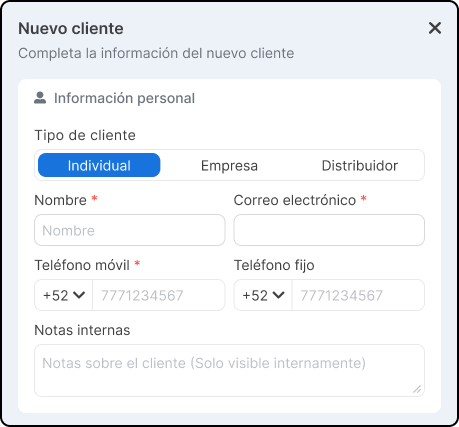
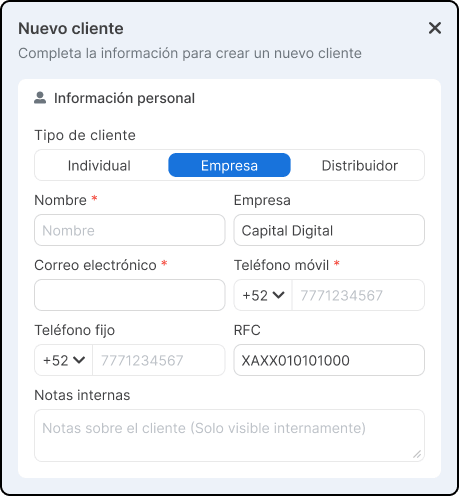
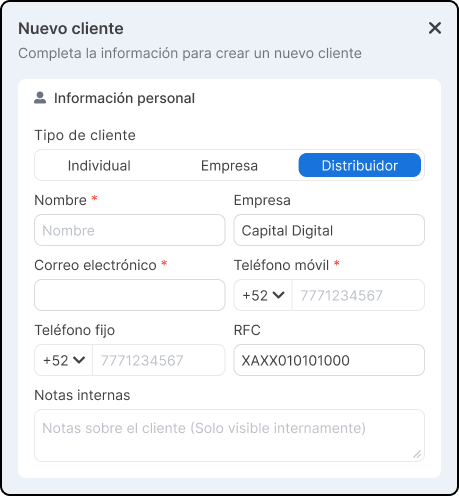
Fill in the contact details according to the customer type
Individual
Company
Distributor
-
The Billing address section is filled automatically with the contact details you entered. Check that they are correct and complete any additional fields:
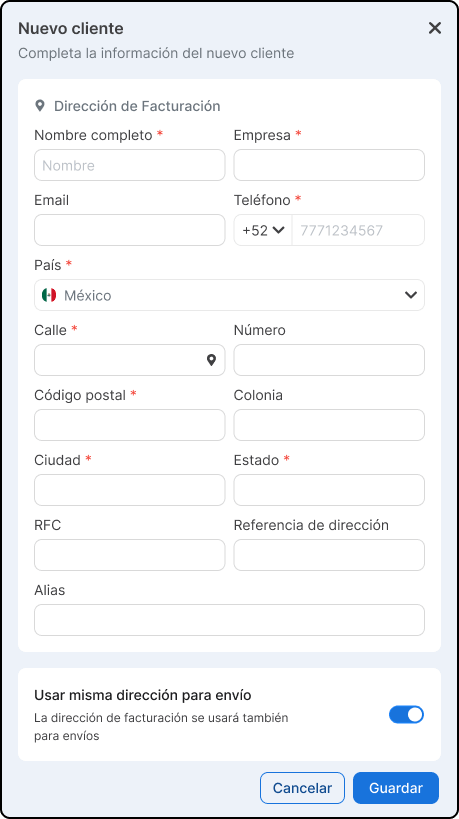
-
Click Save. The customer will be registered and will appear in your customers table.
Generate a shipping label
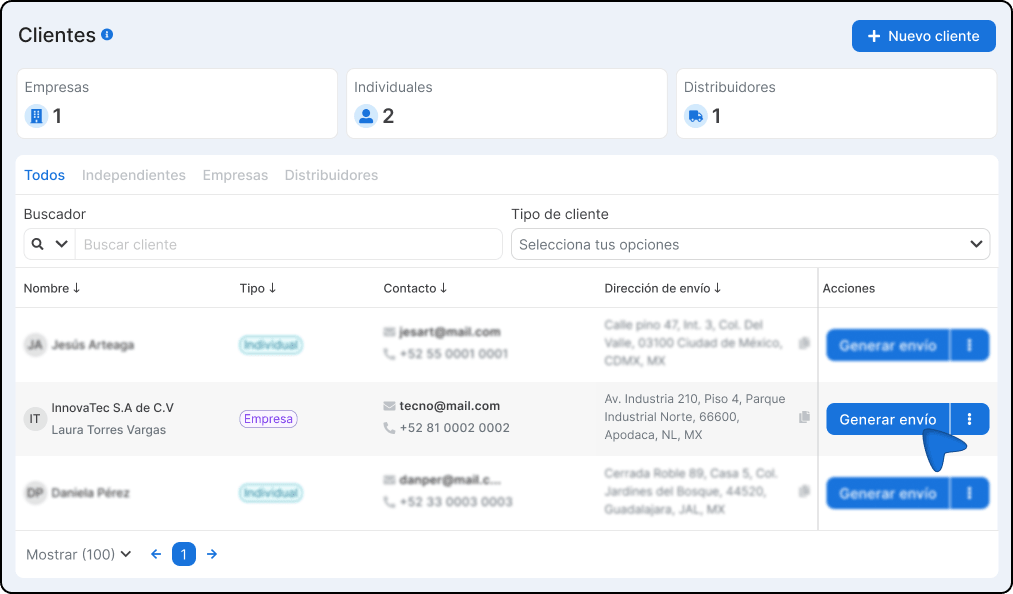
Section titled “Generate a shipping label”Once you have a registered customer, you can generate a shipping label directly from this section without entering their details again.
-
Find the customer in the table using search or the filters.
-
Select the Generate shipment option.
-
The customer’s details will load automatically in the shipment form.
Important notes
Section titled “Important notes”- Fields marked with * on the form are required.
- You can edit or update a customer’s details at any time.
- The Internal notes field does not appear on any label or external document; it is for your use only.
- Having complete billing details speeds up issuing invoices when needed.