

Install Envia.com Plugin - Odoo.sh
The Envia.com Quote and Shipping plugin (version 19.02.02) connects Odoo 19 on Odoo.sh with Envia. Support is from Envia. It does not install on Odoo Online.
With this module you can:
- Quote live rates on the sales order.
- Show home delivery and pickup in the store checkout.
- Create or replace the label from Odoo, on the order’s delivery.
- Open Ecommerce Pro without leaving Odoo (Envia.com > Dashboard).
- Let the connection create the Envia key for you (you do not paste it by hand).
No module offers cash on delivery. Confirming or validating the delivery does not create the label: you have to generate it.
Steps to connect the plugin
Section titled “Steps to connect the plugin”-
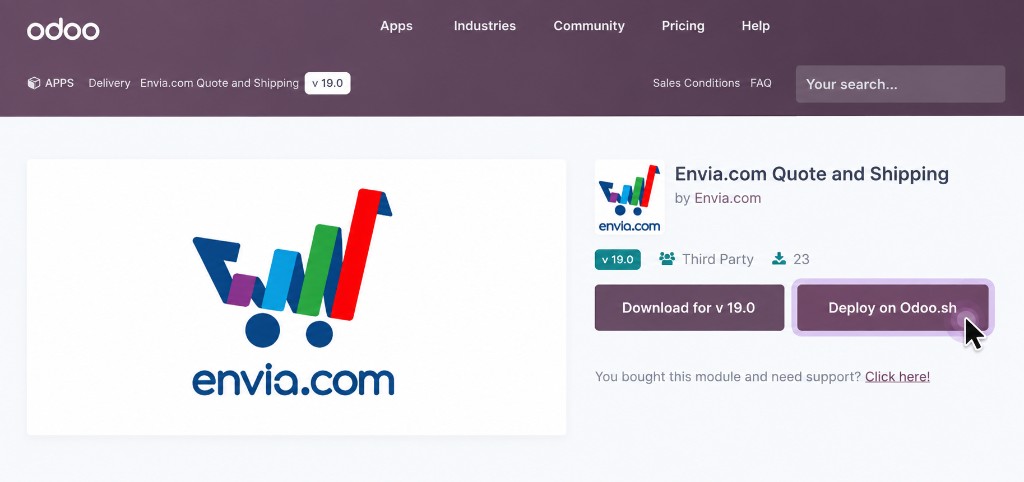
Open the Envia.com Quote and Shipping listing in Odoo Apps. There are two buttons:
- Deploy on Odoo.sh: the recommended option. The integration is more direct. Clicking it takes you to your Odoo.sh projects: choose where you want to install the plugin.
- Download for v 19.0: downloads a zip folder. You upload it to the branch yourself (sometimes you need the terminal). Use it only if you cannot deploy.
-
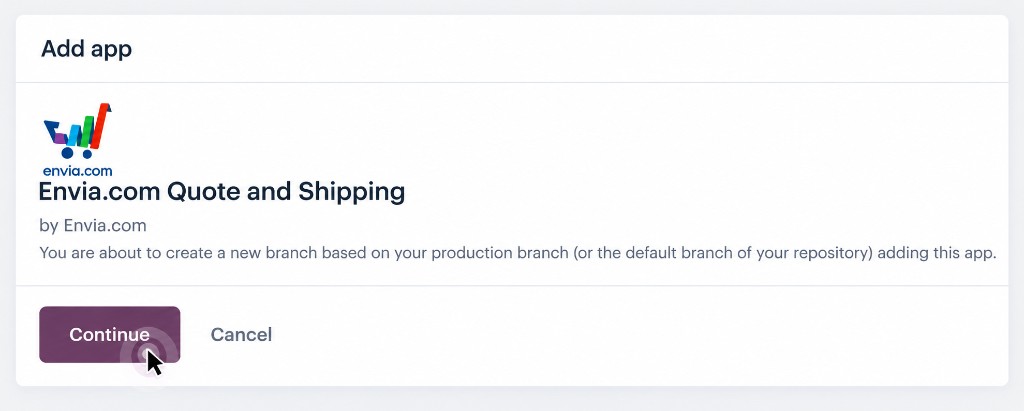
Odoo.sh opens with the Add app box. Click Continue.
-
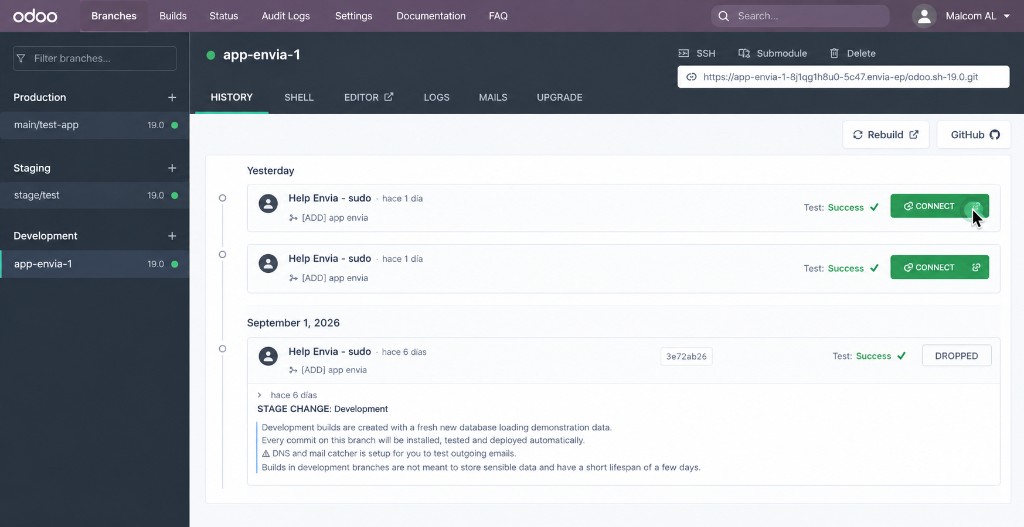
Odoo.sh creates a new Development branch, for example
app-envia-1. When the test is Success, click CONNECT to enter.This Odoo is development: it is for testing the module. It does not create production labels. Do not save real orders: the database lasts a few days and is not backed up. When the module works, move it to Production.
-
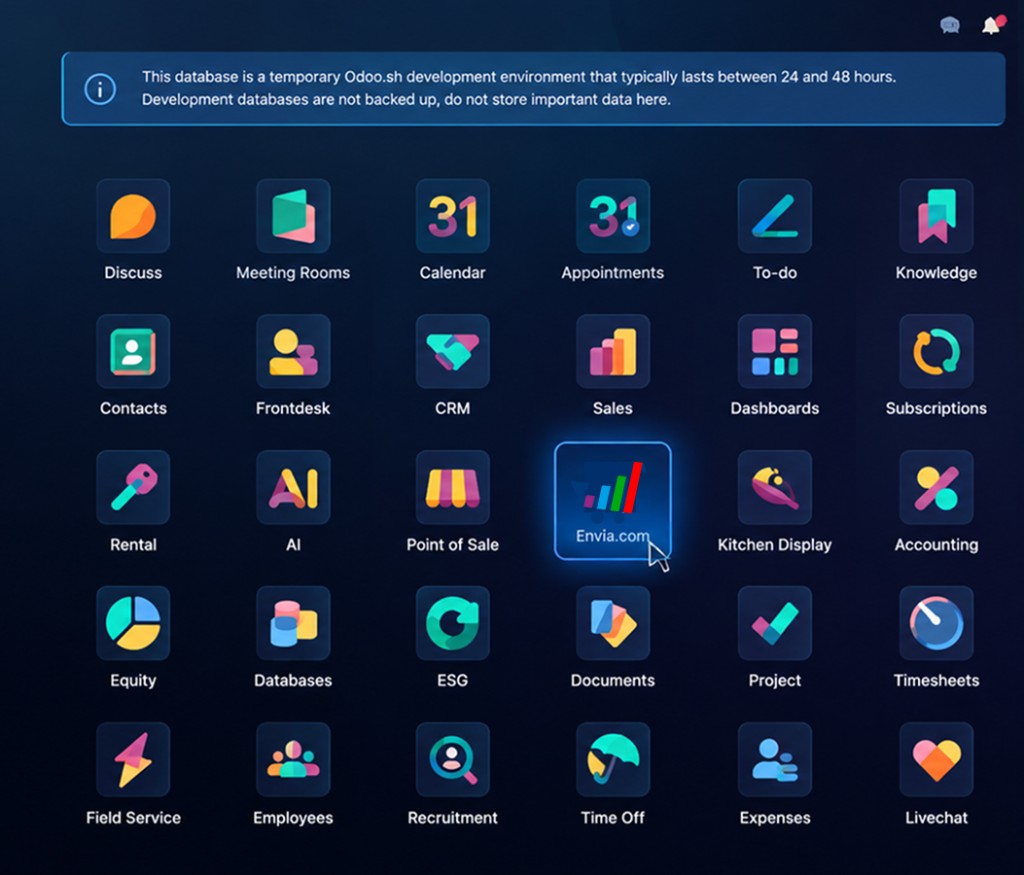
Wait until installation finishes. Open the branch: Envia.com appears on the home screen. Click it.
-
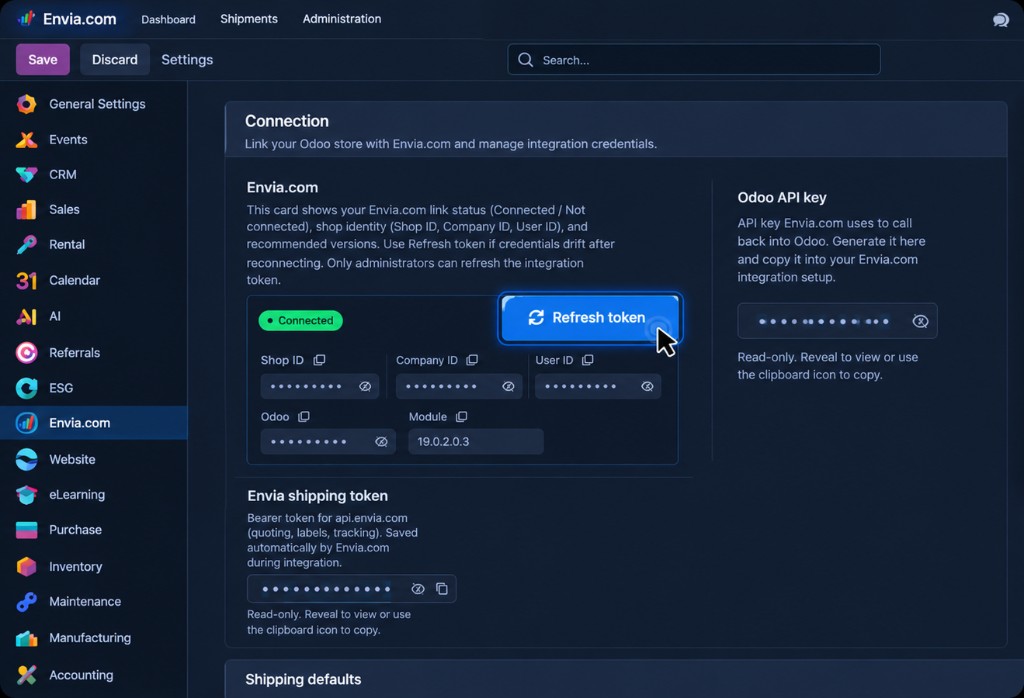
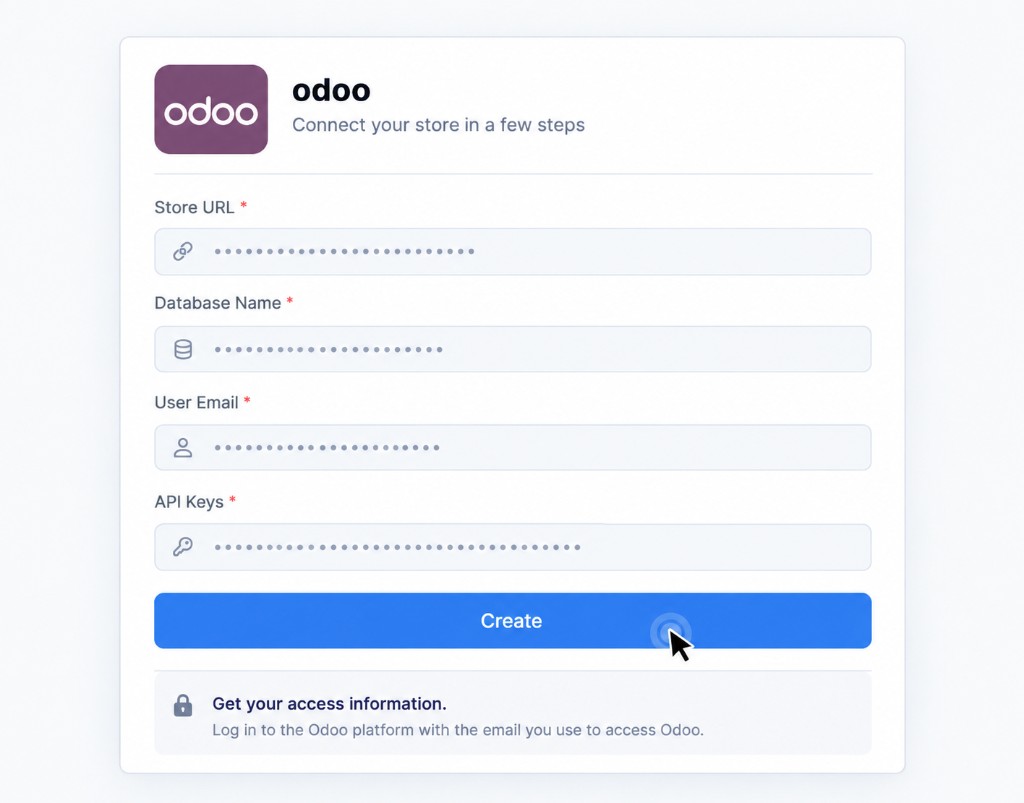
In Envia.com you will see Connection. If you click Refresh token, an Envia page opens with store URL, database name, user email, and keys already filled in. Click Create. The plugin builds those keys for you: you do not copy them by hand.
-
If the green box in Odoo says Connected, the connection is ready. The integration also appears in Envia.com.
Store setup
Section titled “Store setup”With the store already linked, open Envia.com in Odoo. You will see several sections. Below: what each one is and whether you need to configure anything.
Connection
Section titled “Connection”This is the integration status: store and company identifiers, Odoo and module versions, and the keys.
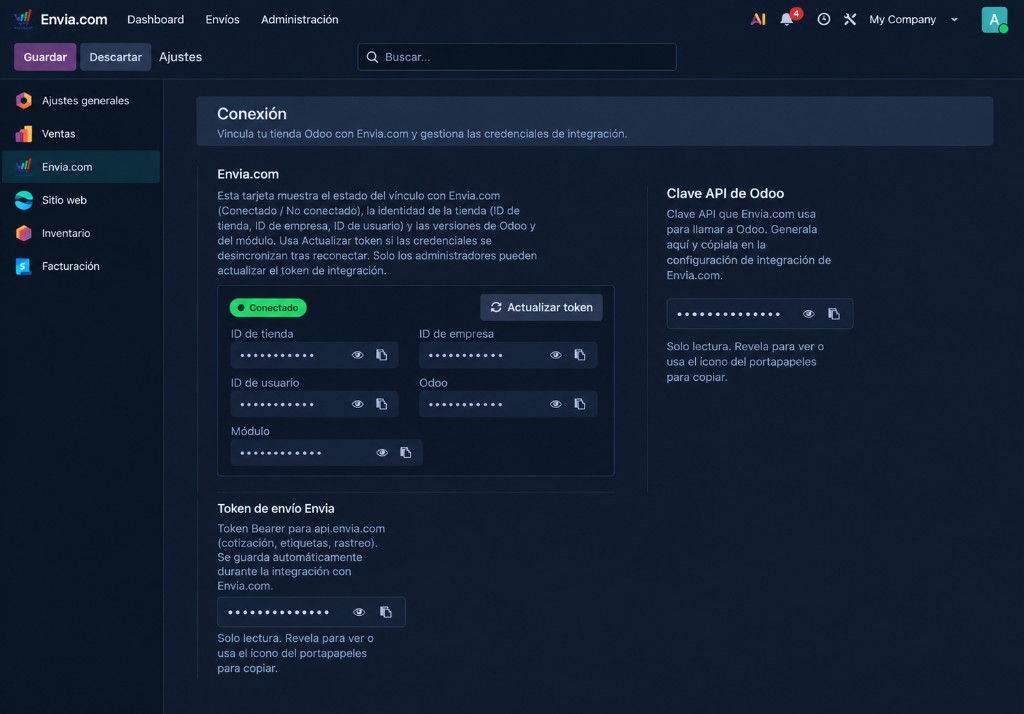
- If the box is green Connected, you do not need to paste keys again.
- Refresh token opens Envia again if credentials fell out of date. Only an administrator can refresh them.
- Odoo and Envia keys are read-only: the plugin saved them when you connected.
Shipping values in the panel
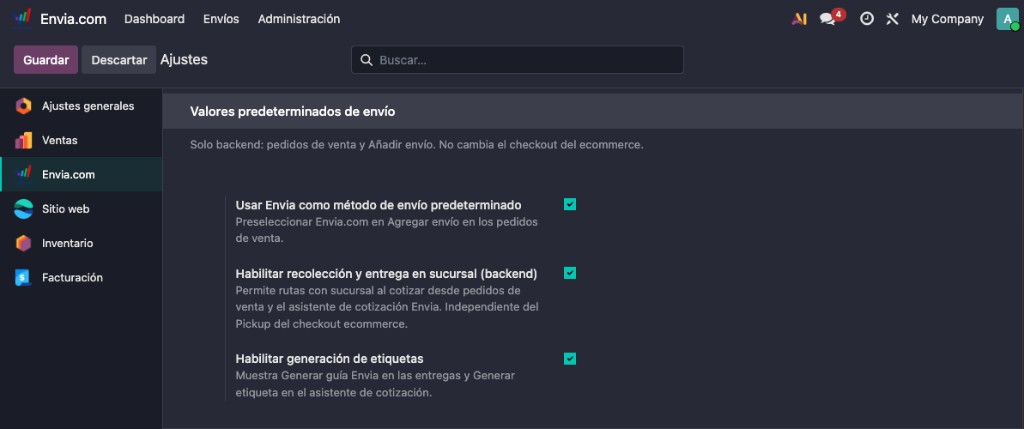
Section titled “Shipping values in the panel”The screen shows Shipping defaults. It applies only to sales orders and Add shipping. It does not change the online store checkout.
- Use Envia as the default shipping method: when you quote on the order, Envia.com is already selected.
- Enable pickup and drop-off at a branch (backend): lets you quote origin or destination at a pickup location from the order. It is independent of checkout pickup.
- Enable label generation: shows Generate Envia Label on deliveries and Generate label when you quote. Turn it on if you will create the label from Odoo. You must also turn on Label generation from the store in Envia.
Origin address
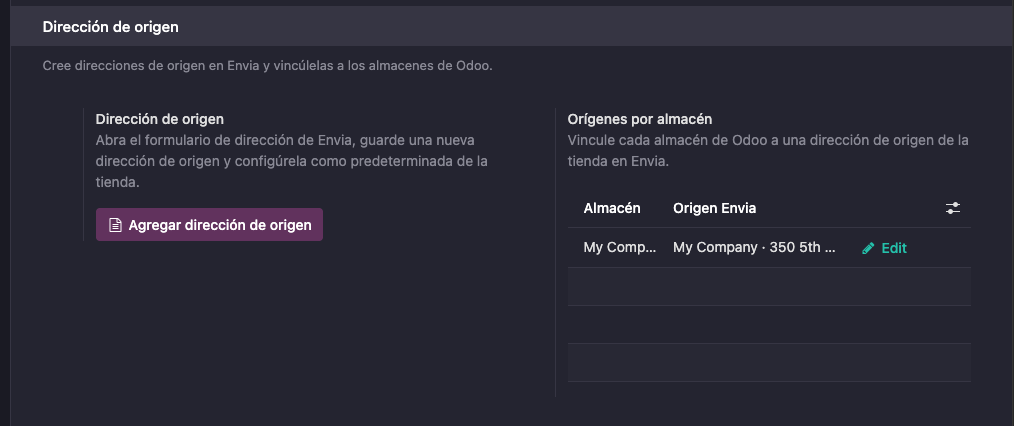
Section titled “Origin address”Links each Odoo warehouse to an Envia origin.
-
In Origin address, you will see Add origin address and Origins by warehouse.
-
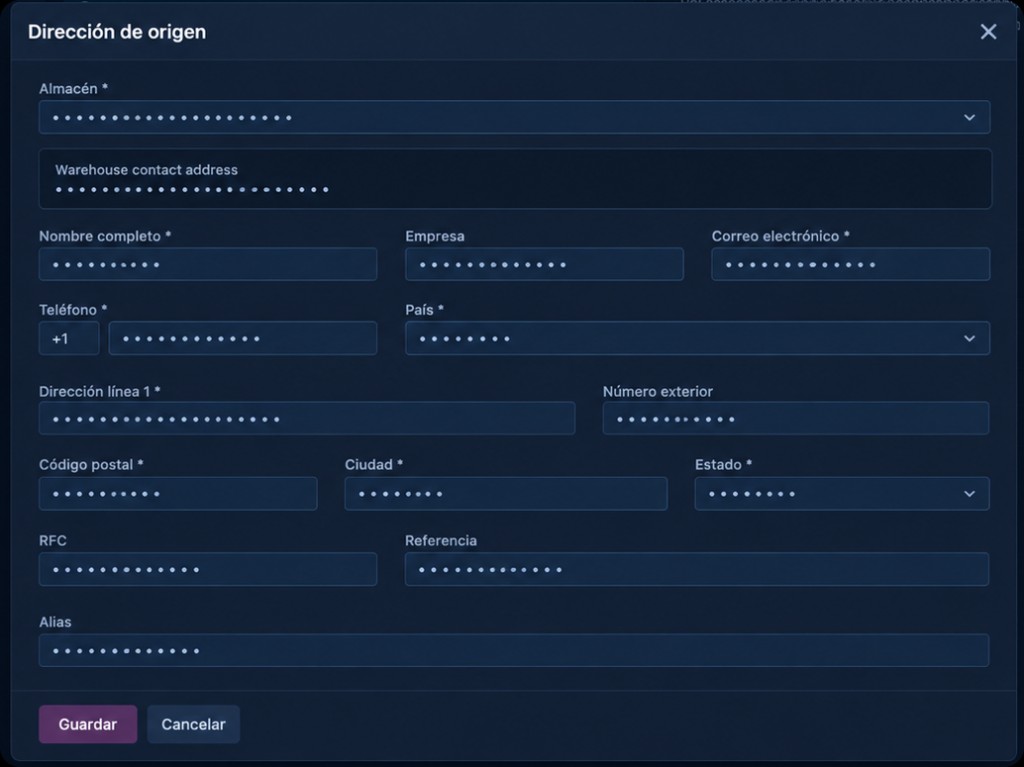
Click Add origin address. Choose the warehouse, review name, phone, country, address, ZIP, city, and state, then click Save.
-
On save, the warehouse is linked automatically under Origins by warehouse. The same origin also shows automatically in Envia.com (origin locations). You do not link it by hand on either side.
-
If you need to change the address, use Edit on that row.
Without an origin you can quote, but not create the label. If you have more warehouses, use Add origin address again for each one: the link is created on save.
Online store checkout
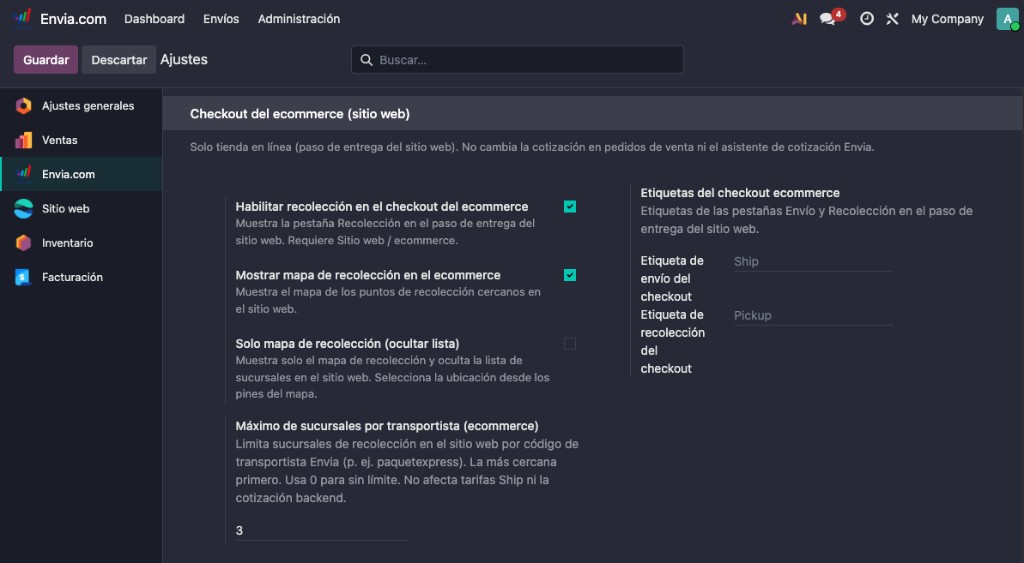
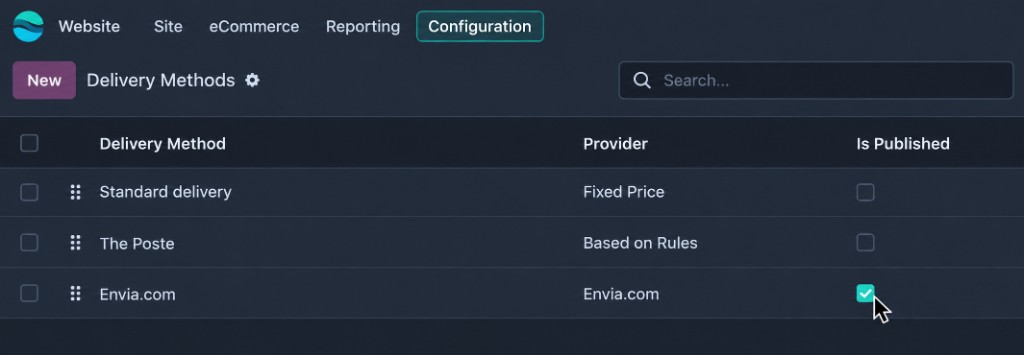
Section titled “Online store checkout”The screen shows Ecommerce checkout (website). It applies only to the online store. First turn on checkout and carriers in Envia; then publish the method under Website > Delivery Methods > Envia.com.
- Enable pickup in the ecommerce checkout: shows the pickup tab on the delivery step. You need Website / ecommerce.
- Show pickup map in ecommerce: map of nearby locations.
- Pickup map only (hide list): map only, no list.
- Maximum locations per carrier (ecommerce): how many locations are shown. 0 = no limit.
- Checkout shipping label and pickup label: tab names (defaults
ShipandPickup).
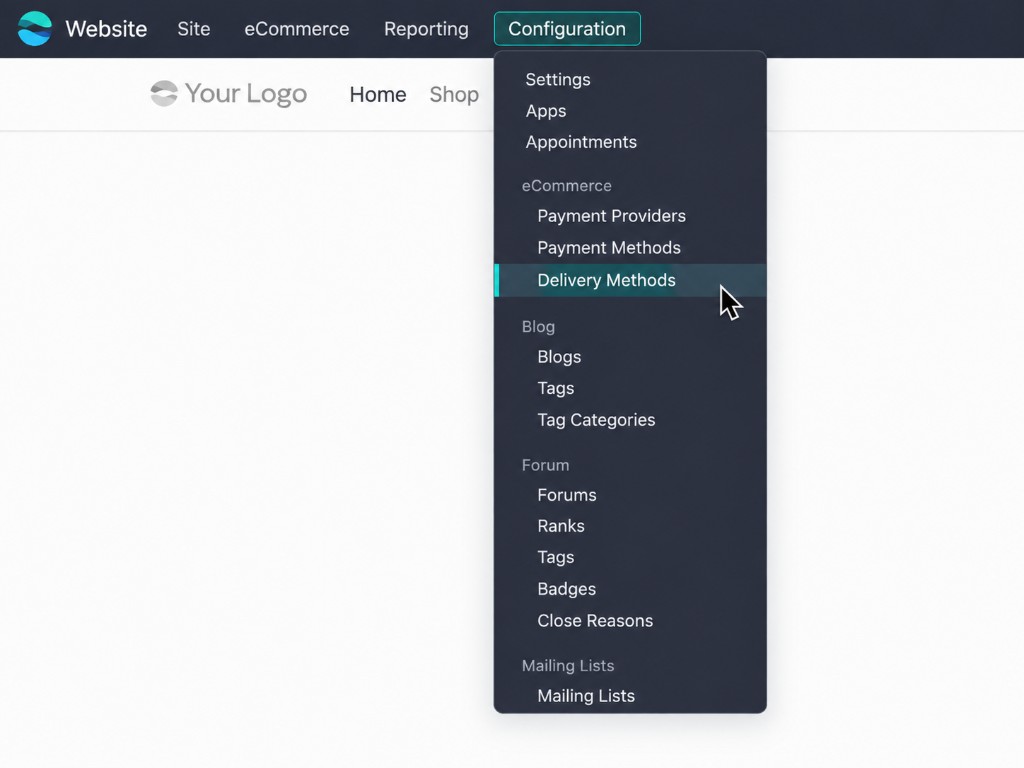
For the buyer to see it at payment, publish the method on the site:
-
In Website, open Configuration > Delivery Methods.
-
In the list, mark Is Published on Envia.com.
Settings in Envia
Section titled “Settings in Envia”Open it from Envia.com > Dashboard or Ecommerce Pro > Set up your store.
-
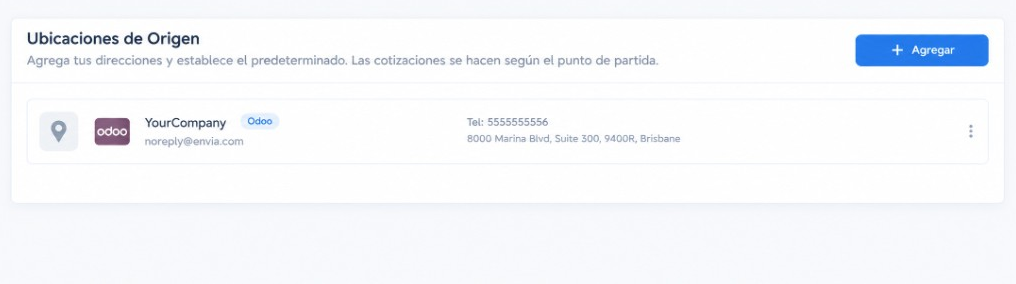
Origin locations: the warehouse you saved in Odoo shows automatically. It has the Odoo badge.
-
Packages: define the packages you use to quote and create the label.

-
Label generation from the store: if you turn it on, the store can create labels from the Odoo panel without opening Envia. It is off by default. It is not the same as Automatic label creation.

-
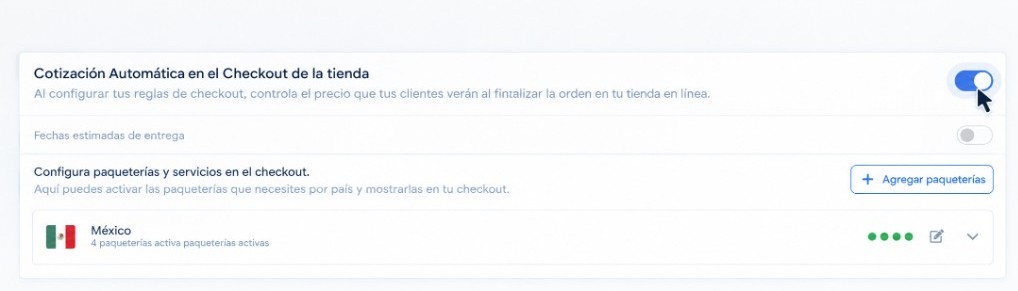
Automatic quoting in the store checkout: turn it on and select the shipping services (carriers) the buyer will choose from.
-
Products: Odoo sends the real weight. If a product has no weight, the plugin uses 1 kg.
How checkout looks
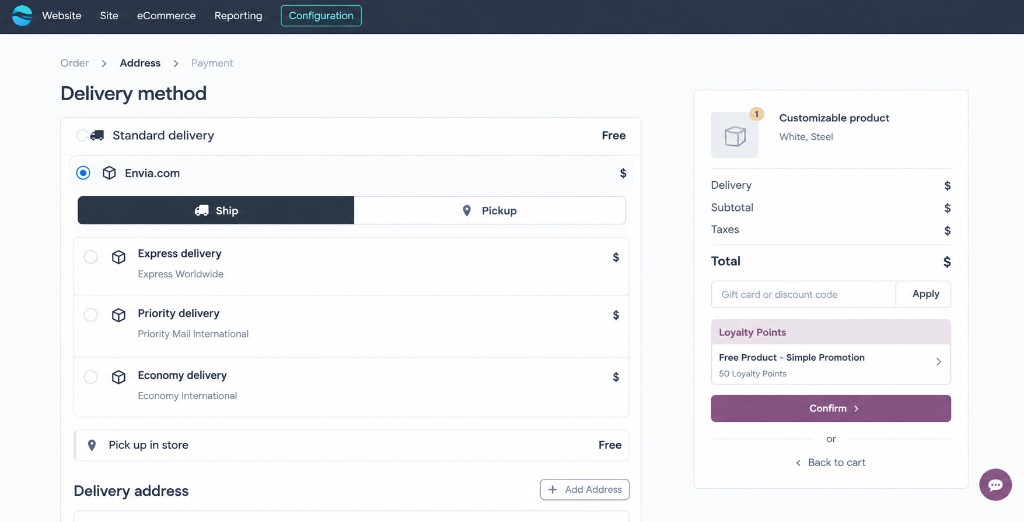
Section titled “How checkout looks”When checkout is on in Envia and the Envia.com method is published under Website > Delivery Methods, the buyer sees the carriers at payment.
In Delivery method, Envia.com appears. There they pick a service with a price. The Ship and Pickup tabs are home delivery and pickup location. If there are other Odoo methods (for example standard shipping), those are Odoo’s, not Envia’s. If you only use Envia, the buyer sees only Envia.
The carriers that appear are the ones you turned on in Automatic quoting in checkout. Real origin and destination: if the address has no coverage, checkout may say there is no service for that route.
Home delivery and pickup
Section titled “Home delivery and pickup”These are two delivery options in the same Envia checkout:
| Home delivery | Pickup | |
|---|---|---|
| What it is | Shipping to the buyer’s address | Pickup at a carrier location |
| What the buyer chooses | A service to their address | A location (map, list, or both) |
| Default | The cheapest home option | Only if you turned it on |
If you turn it on only in Odoo or only in Envia, the buyer does not see it. In Maximum locations per carrier, 0 means no limit.
After the purchase
Section titled “After the purchase”The order arrives in Sales in Odoo (checkout or a manual order) and also in Envia. The Odoo order keeps the carrier the buyer chose. From there you open the Delivery.
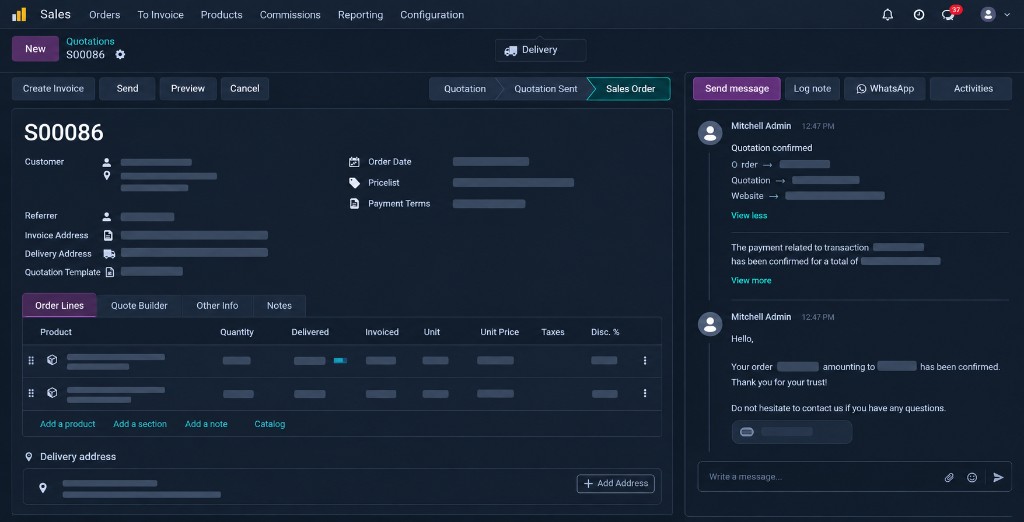
You can change the shipping method even if the order already has a carrier and is confirmed. Odoo allows it.
- Open the sales order.
- Click Add shipping or Get rate.
- Choose Envia.com, home or pickup, and quote again.
- Choose another service and add it.
That change reaches Envia when you create the label. Until then, Envia still has the previous choice. If a label already exists, replace it in the step below.
Create or replace the label
Section titled “Create or replace the label”The delivery is the inventory document for the order. That is where the label is created.
- Confirm that Label generation from the store is on in Set up your store.
- Confirm the sales order and open the delivery, for example
WH/OUT/…. - Use Generate Envia Label.
- If a label already exists and you must change service, use Replace Envia Label. That unlinks tracking from the order and attaches a new one: it does not cancel the previous label. Cancellation is done in Envia. On the same delivery you see Tracking and Envia Shipments.
You can also use Generate label in the quote-shipping wizard.
If it does not connect
Section titled “If it does not connect”- Odoo Online does not install this plugin. Use Odoo.sh, or choose Connect Odoo Online/Odoo SaaS or Install Odoo Module - Odoo Online/Odoo SaaS.
- If you were using Odoo’s module, uninstall Envia Shipping first.
- If checkout does not show Envia, turn it on in Envia and publish it under Website > Delivery Methods.
- If the label does not appear on the delivery, turn on Label generation from the store. Validating the delivery is not enough.
- A plugin update does not arrive on its own: Deploy on Odoo.sh again and move the branch to production when it is ready.
Frequently asked questions
Section titled “Frequently asked questions”Does the plugin create the label in Odoo?
Yes, if you turn on Label generation from the store. It is created with Generate Envia Label on the delivery, not on validate.
Who helps if it fails?
Support for this plugin is from Envia.
Can I leave Envia Shipping and the plugin together?
No. Uninstall Envia Shipping before you deploy the plugin.