

Custom emails for shipments
Every time a shipment status changes, your customer can receive an automatic email that tells them what is happening with their package. With custom emails you can design those messages with your brand, your style, and the information you choose, instead of going out with the carrier’s generic design.
Go to Buyer experience > Custom emails to access this section.
How does it work?
Section titled “How does it work?”-
Automation: Emails are sent every time the package status changes.
-
Flexibility: You can choose between predesigned templates or create your own.
-
Relevant information: Each email includes important shipment details.
-
Full customization: Add your logo, colors, and style for a professional look
Default and custom emails
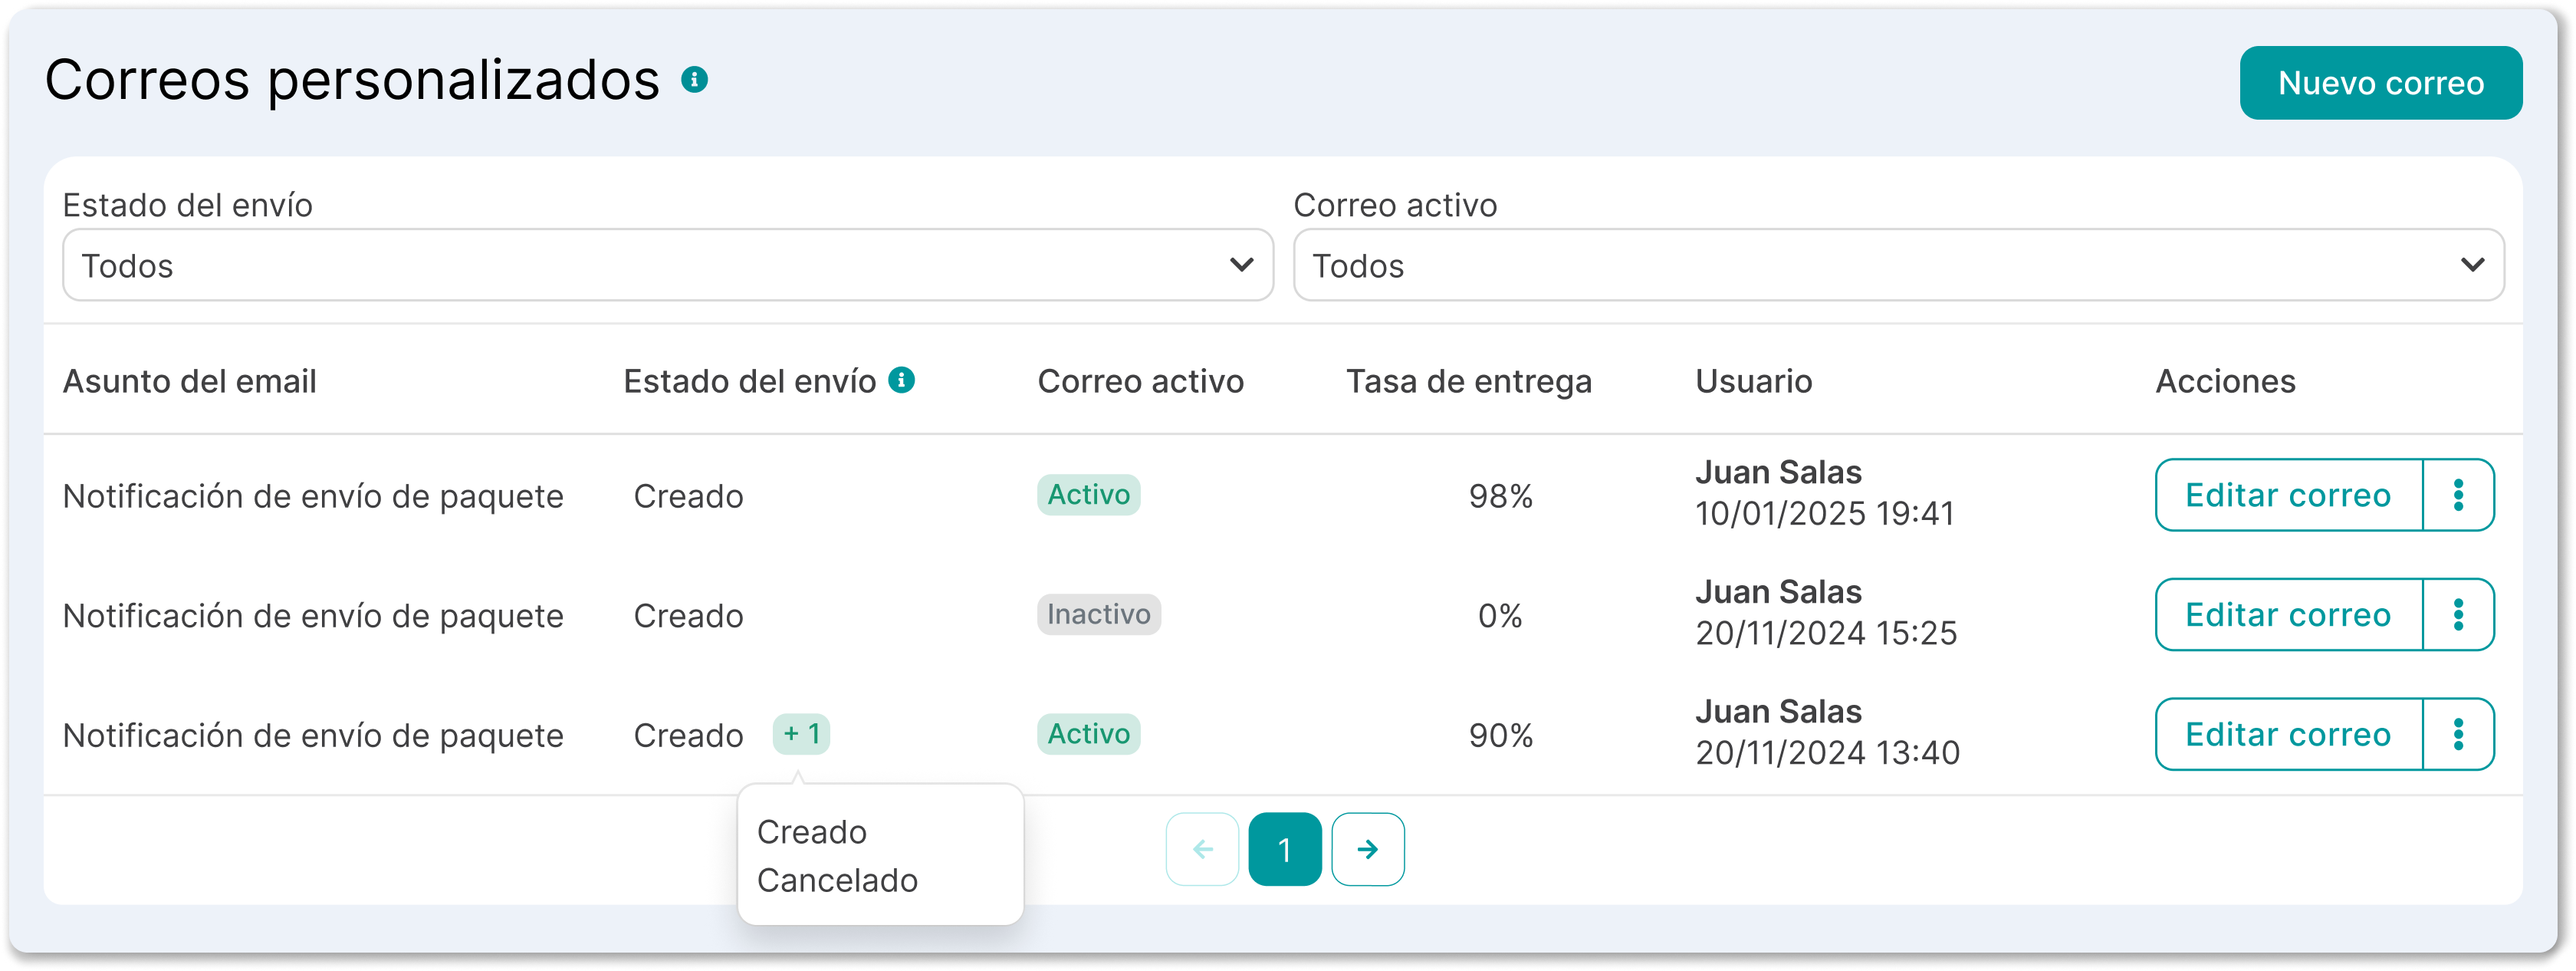
Section titled “Default and custom emails”When you enter you will see a list of emails. Those marked as Default are base templates that Envia.com already has configured for the most common statuses. You can use them as they are or create your own from scratch.
The table shows:
| Column | What it means |
|---|---|
| Email subject | The title the recipient will see in their inbox |
| Shipment status | The event that triggers the automatic email |
| Email Active | Green = active / Gray = inactive |
| Delivery rate | Percentage of emails that arrived successfully to the recipient |
| Destination country | Country this email applies to |
| User | Who created or modified the email |
| Actions | Edit, duplicate, send a test email, deactivate, or delete |
Create a custom email
Section titled “Create a custom email”-
Sign in to your Envia.com account
-
Click the New email button
-
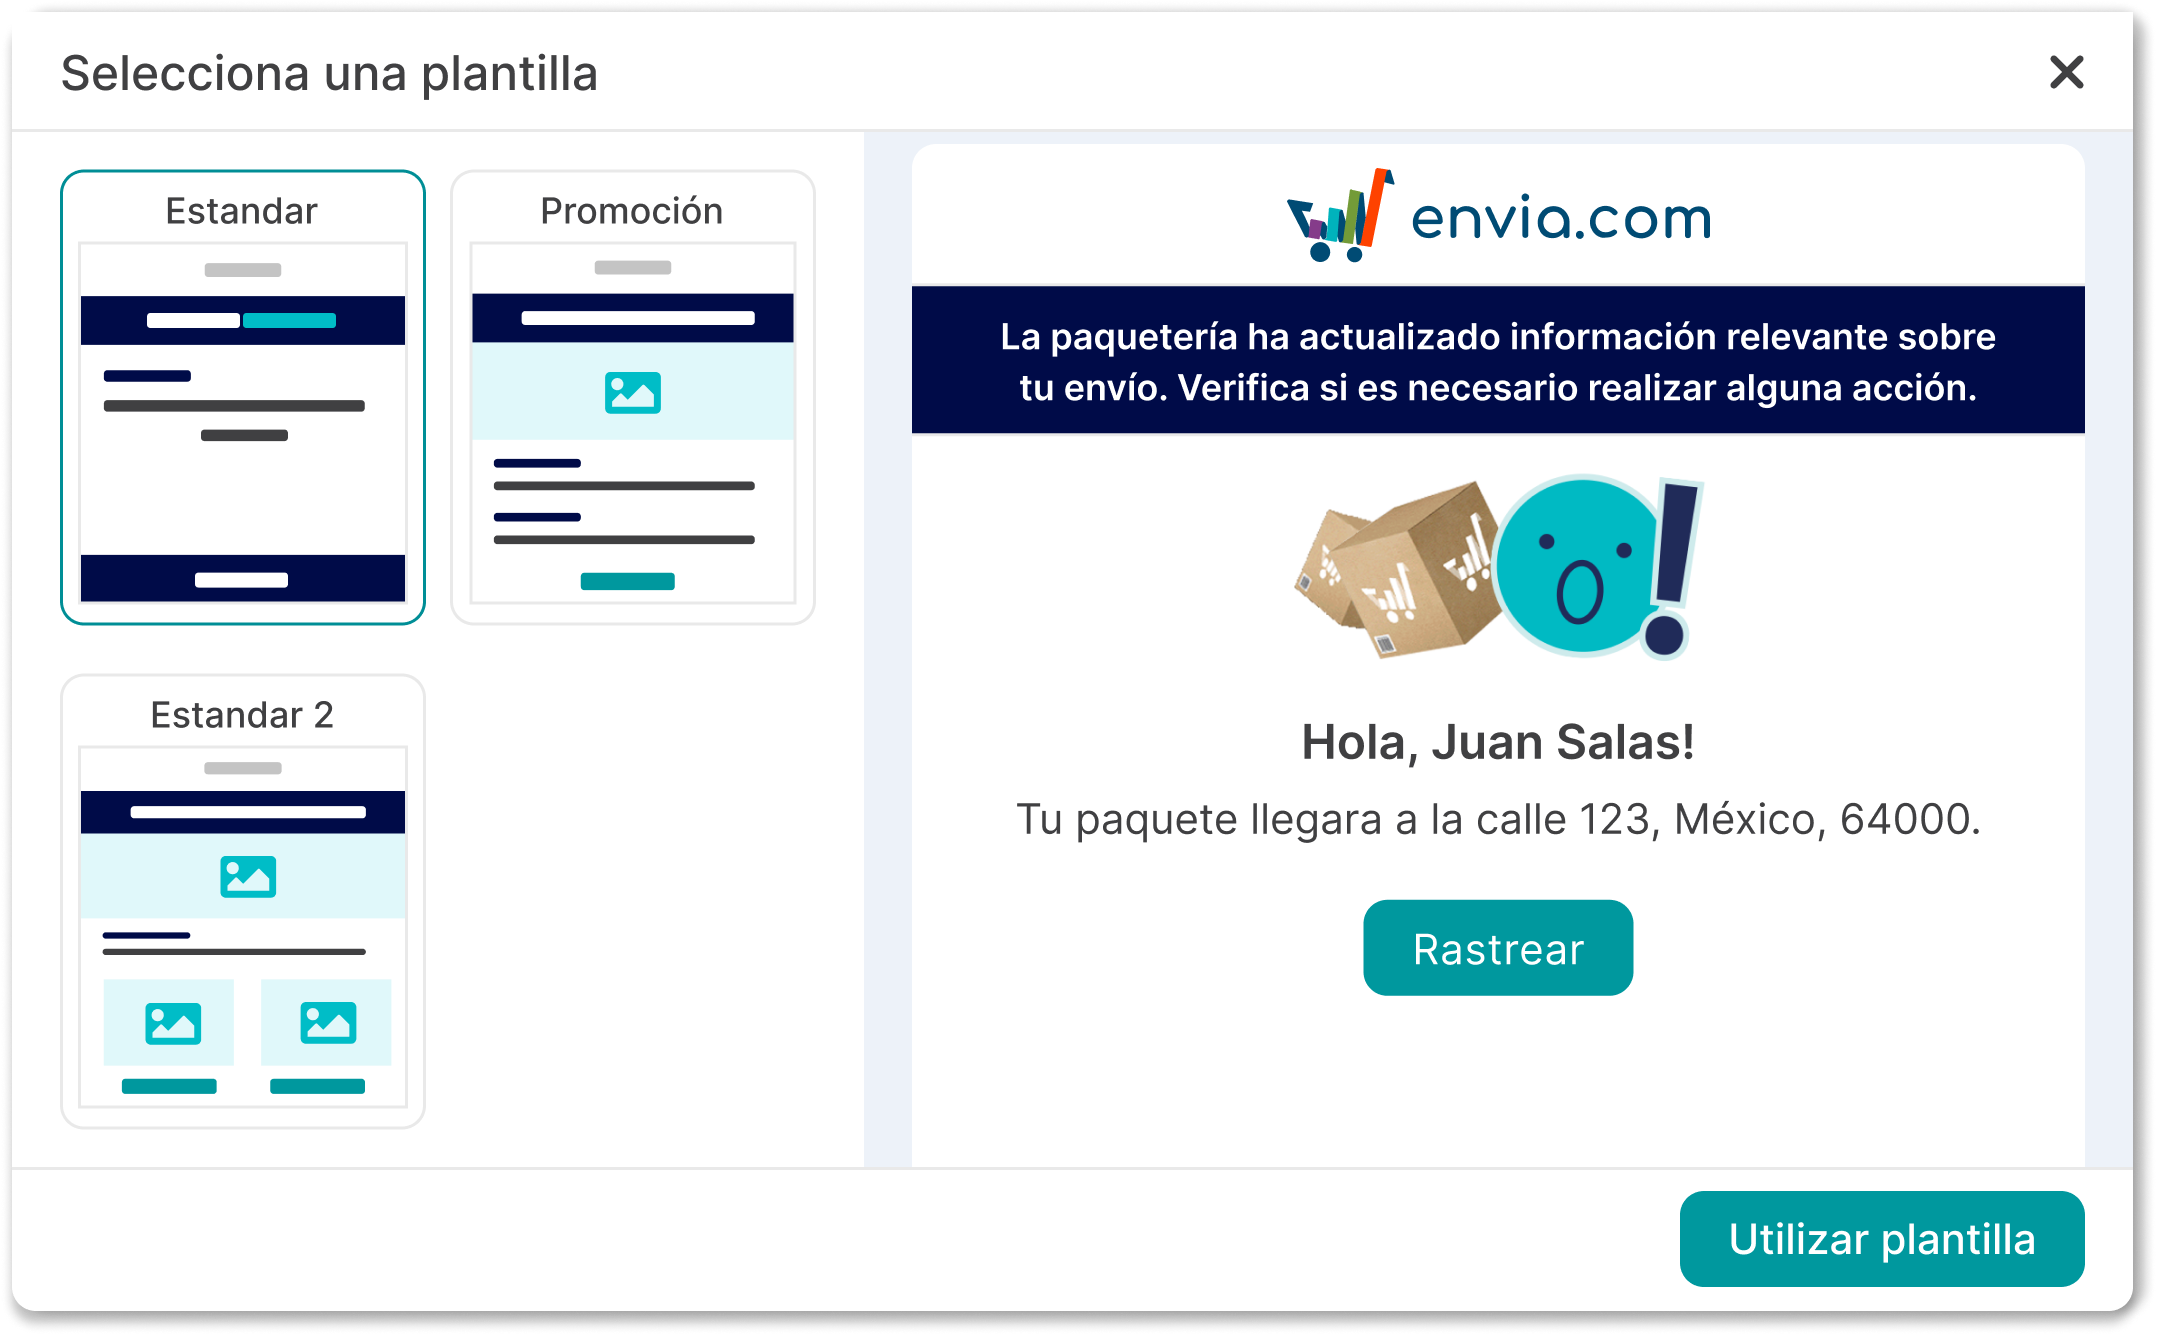
Choose among the available templates. You can see a preview before you select. When you find the one that best fits your brand, click Use template.
-
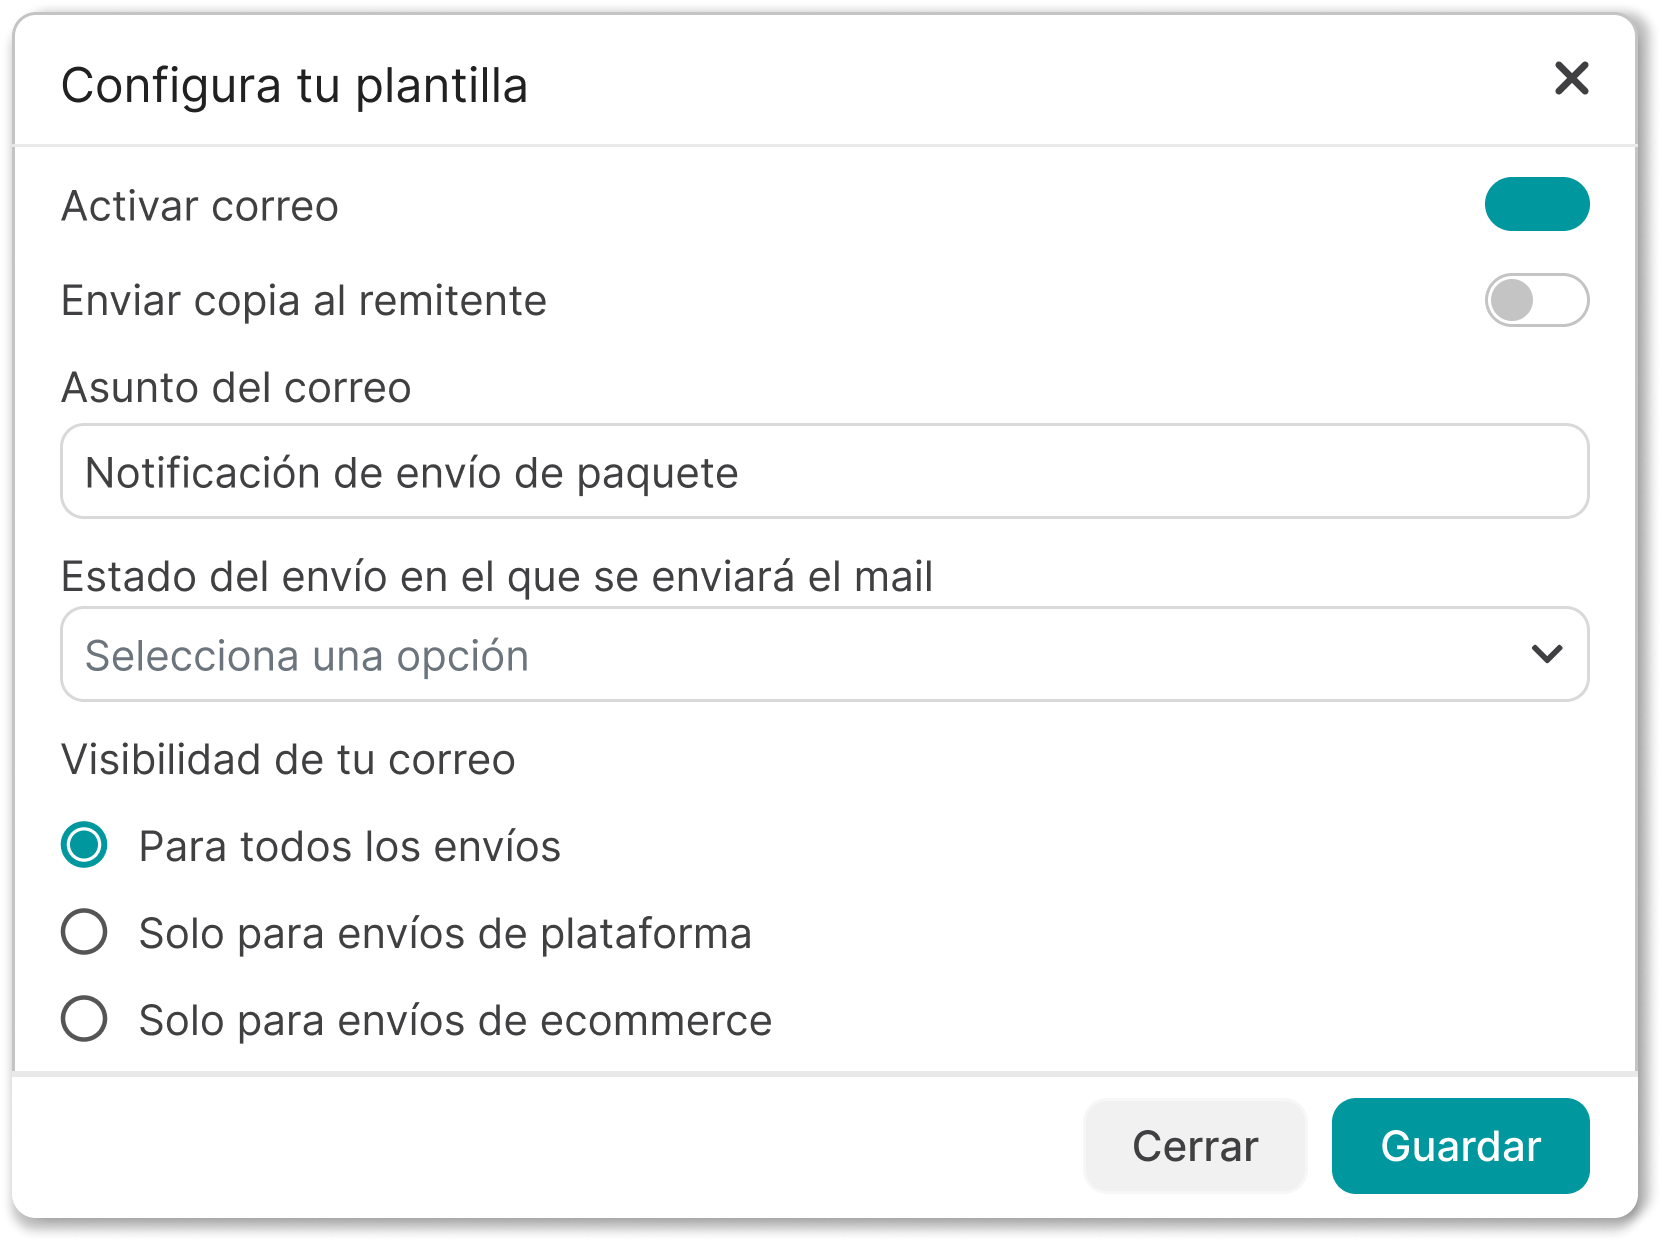
Configure your template before editing the design and click Save when it is ready.
- Enable email: Option to turn this email on or off. An inactive email is not sent even if the shipment status matches.
- Send a copy to the sender: If you enable it, the shipment sender will also receive a copy of the email.
- Email subject: The text that will appear in the recipient’s inbox.
- Destination country: The country this email applies to. If your operation covers several countries, you can create a different email for each one.
- Visibility: Defines which type of shipments this email applies to:
- For all shipments: it is sent regardless of the order origin
- Platform shipments only: only for shipments created manually in Envia.com
- Ecommerce shipments only: only for orders that come from connected stores (Shopify, WooCommerce, etc.)
- Shipment status: The event that triggers the email (Created, Shipped, Delivered, In transit, Incident, etc.)
-
The editor lets you design the email visually.
In the left panel you will find the available Variables, organized in three categories. Each variable is automatically replaced with the real shipment data when the email is sent:
Shipment information
- Shipment status
- Tracking number
- Tracking page
- Additional services
- Carrier
Origin information
- Name
- Company
- Street and number
- References
- Postal code
- City and country
- Sender state
Recipient information
- Name
- Company
- Street and number
- References
- Postal code
- City and country
- Recipient state
In the right panel you have the available content blocks:
Block What it is for Columns Organize content in columns Button Add buttons with links Divider Separator lines between sections Heading Titles and subtitles Paragraph Text blocks Image Your own images Body Main email container Carousel Image gallery Social Social network icons Menu Navigation bar HTML Custom HTML code for advanced users -
When the design is ready, turn on Enable custom email at the top of the editor and click Save. From that moment, every time a shipment reaches the configured status, the email will be sent automatically to the recipient.
Send a test email
Section titled “Send a test email”Before you enable the email, use the Send test email button at the top of the editor. You will receive the email at your registered address so you can verify that the design and content look correct.
Frequently asked questions
Section titled “Frequently asked questions”Why are my custom emails not being sent? Check these points:
- The email option must be green (active)
- The configured shipment status must match the actual package status
- The shipment destination country must match the one configured in the email
Can I have several emails for the same status? Yes. You can create an email per destination country or per shipment type (platform vs. ecommerce) for the same status.
What is the difference between default and custom emails? Default emails are Envia.com base templates that are sent if you do not have an active custom email for that status. Custom emails take priority and replace the default when they are active.
Can I edit a default email? Not directly, but you can duplicate it and edit it as your own custom email.
Can the delivery rate be 0%? Yes. If the email is active but has not been sent for any shipment in that status yet, the rate shows as 0%.